

Add a new client
Create the brand's client account and set it up for fulfillment.
Every brand you fulfill for is a client. Creating the client account is the first step of onboarding, and everything else (their store connection, their users, their orders and inventory) hangs off it.
Client accounts live on the Clients page. Only a Tenant Admin can add or edit clients. Operators can open the page and read the list, and the write buttons are still visible to them, but the server rejects the save with an admin-required error. For the screen-by-screen detail, see the Administration manual.
Before you start
- You need a Tenant Admin login.
- Have the brand's basics on hand: their name, a short code you'll use for them everywhere, a billing email, and the currency they sell in.
Create the client
Open Clients and press Add Client
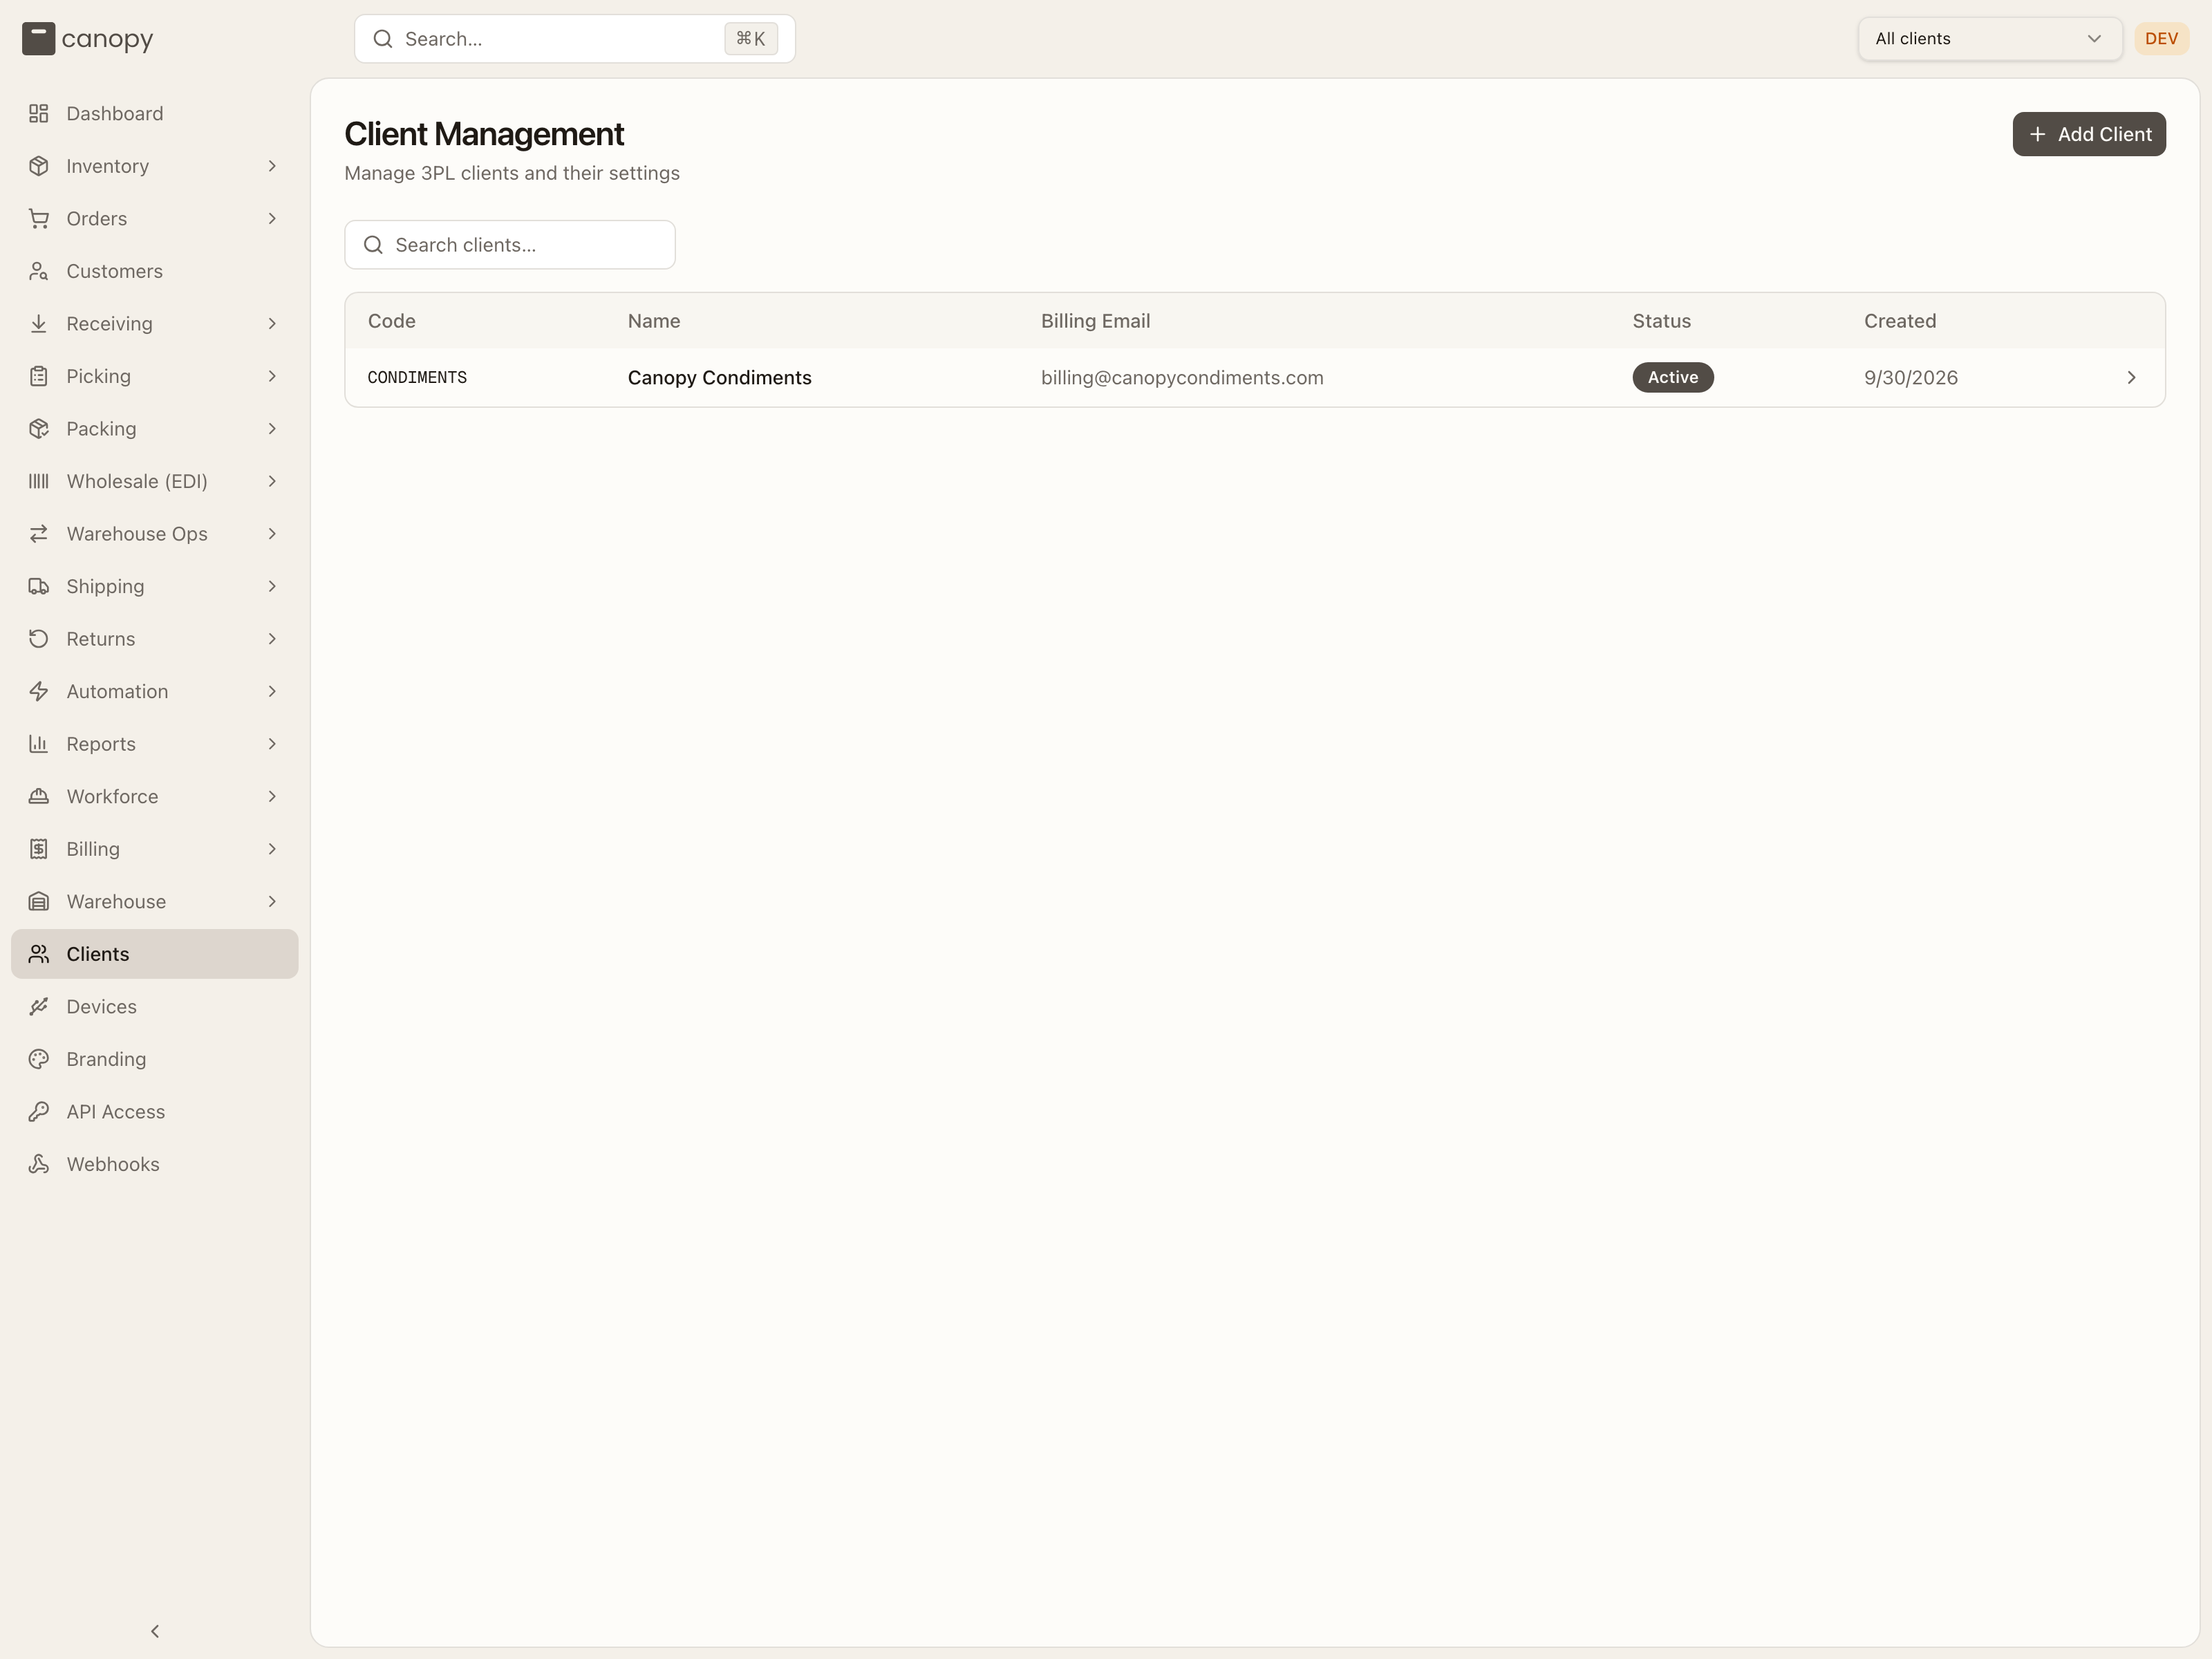
Go to Clients in the sidebar. The list shows every brand you already fulfill for. Press Add Client in the top right.
Fill in the client's details
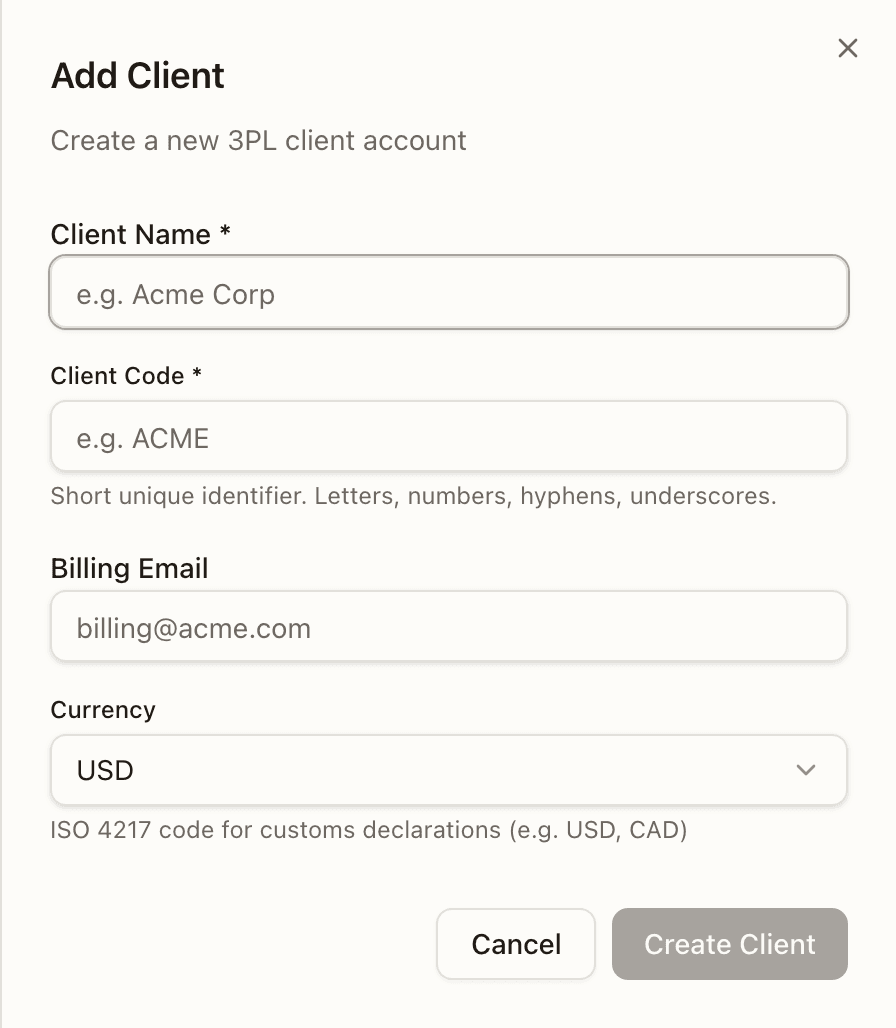
The Add Client sheet asks for four things:
- Client Name (required). The brand's display name, for example
Acme Corp. - Client Code (required). A short unique identifier in letters, numbers,
hyphens, and underscores. It is uppercased automatically and shows up all
over the app, so keep it short and recognizable, like
ACME. - Billing Email (optional). Where billing correspondence goes.
- Currency (optional, defaults to USD). The ISO 4217 code used on customs
declarations, for example
USDorCAD.
Press Create Client. The new client appears in the list immediately.
Tune the client's fulfillment settings
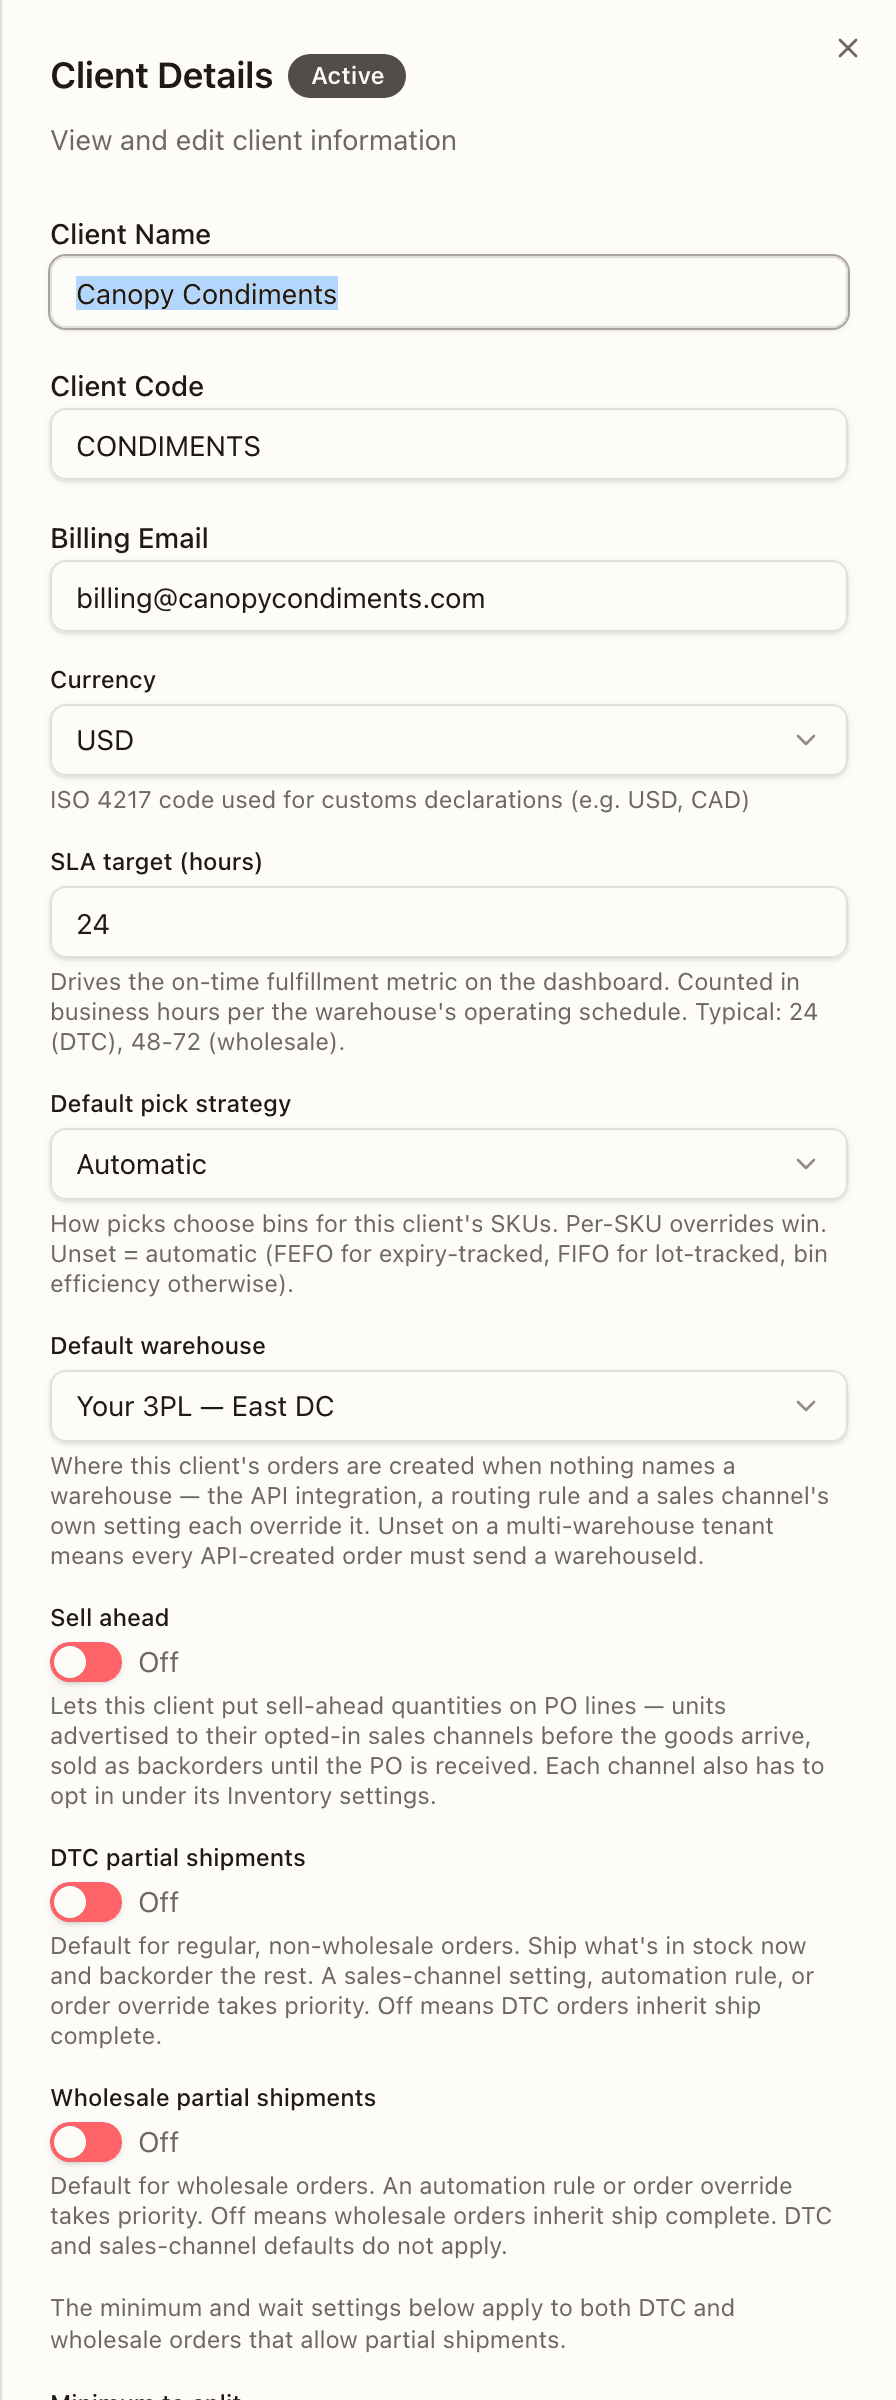
Click the new row to open its detail panel. A few settings are worth setting now rather than later:
- SLA target (hours). Drives the on-time fulfillment metric on the dashboard. Typical values are 24 for DTC and 48 to 72 for wholesale.
- Default pick strategy. How picks choose bins for this client's SKUs. Automatic is the right default for most clients.
- Default warehouse (admins only). Where this client's orders are created when nothing else names a warehouse, and where its purchase orders, returns and work orders land when nothing else places them. Set it before you run a second warehouse: on a multi-warehouse tenant, anything of this client's that nothing else places is refused while it's unset.
- DTC partial shipments and Wholesale partial shipments. Independent defaults for shipping available stock now and backordering the rest. Wholesale starts off. An order override or automation rule can allow or disallow a split. The sales-channel setting overrides only the DTC default.
- Minimum to split and Wait before splitting (hours). Optional limits shared by DTC and wholesale on when a short order splits: the units and value its in-stock part must reach, and how long it must have been short. Empty means none. See when a short order waits instead.
- Order merging (admins only; the card is there only while order merging is switched on for your 3PL). Whether this client's open orders to the same person and address are offered for merging into one box, and the rules that group them — a card with its own Save merge rules. See Order merging.
- Sell ahead. Whether the client may put sell-ahead quantities on PO lines — units offered to their opted-in sales channels before the goods arrive.
- Pack video (admins only). Whether this brand's packs are recorded, whether the brand's own users may share links to the videos (Brand may share links), and how long the clips are kept. The card has its own Save video settings. See Pack video.
Press Save Changes — it only lights up once something has changed.
The Clients reference explains every field on this panel.
What's next
The client account is an empty shell until you wire it up:
- Connect their sales channel so orders start flowing in.
- Invite their users so the brand can log in and see their own data.
- Follow the full onboarding checklist for the rest (carriers, stock, first order).