

Administration
Manage your 3PL's clients, the users who run the warehouse, their task roles, and your tenant's branding.
The administration pages set up the accounts around the warehouse: the clients (the brands you fulfill for), the users (your staff and your clients' logins), the task roles that narrow a floor worker to one job, and your branding.
Who can do what
"Administration" is a grouping in this guide — in the app these live in separate sidebar entries (Clients, Workforce → Users, Branding), and the Clients page is titled "Client Management."
- Clients — any warehouse staffer can open the list and a client's detail panel. The Add Client, Save Changes, and Deactivate Client buttons render for operators too, but every client write is admin-gated on the server: an operator who presses one gets "Admin access required" back and nothing changes. The one control hidden from operators outright is Default warehouse.
- Users is admin-only in full — an operator who opens it sees only "Admin access required to manage users," never the list.
- Branding is admin-only: the sidebar entry appears for admins only, and the save is admin-gated on the server.
- Bin types is read-only for everyone in your tenant — the catalogue is Canopy's, shared across every tenant.
Clients
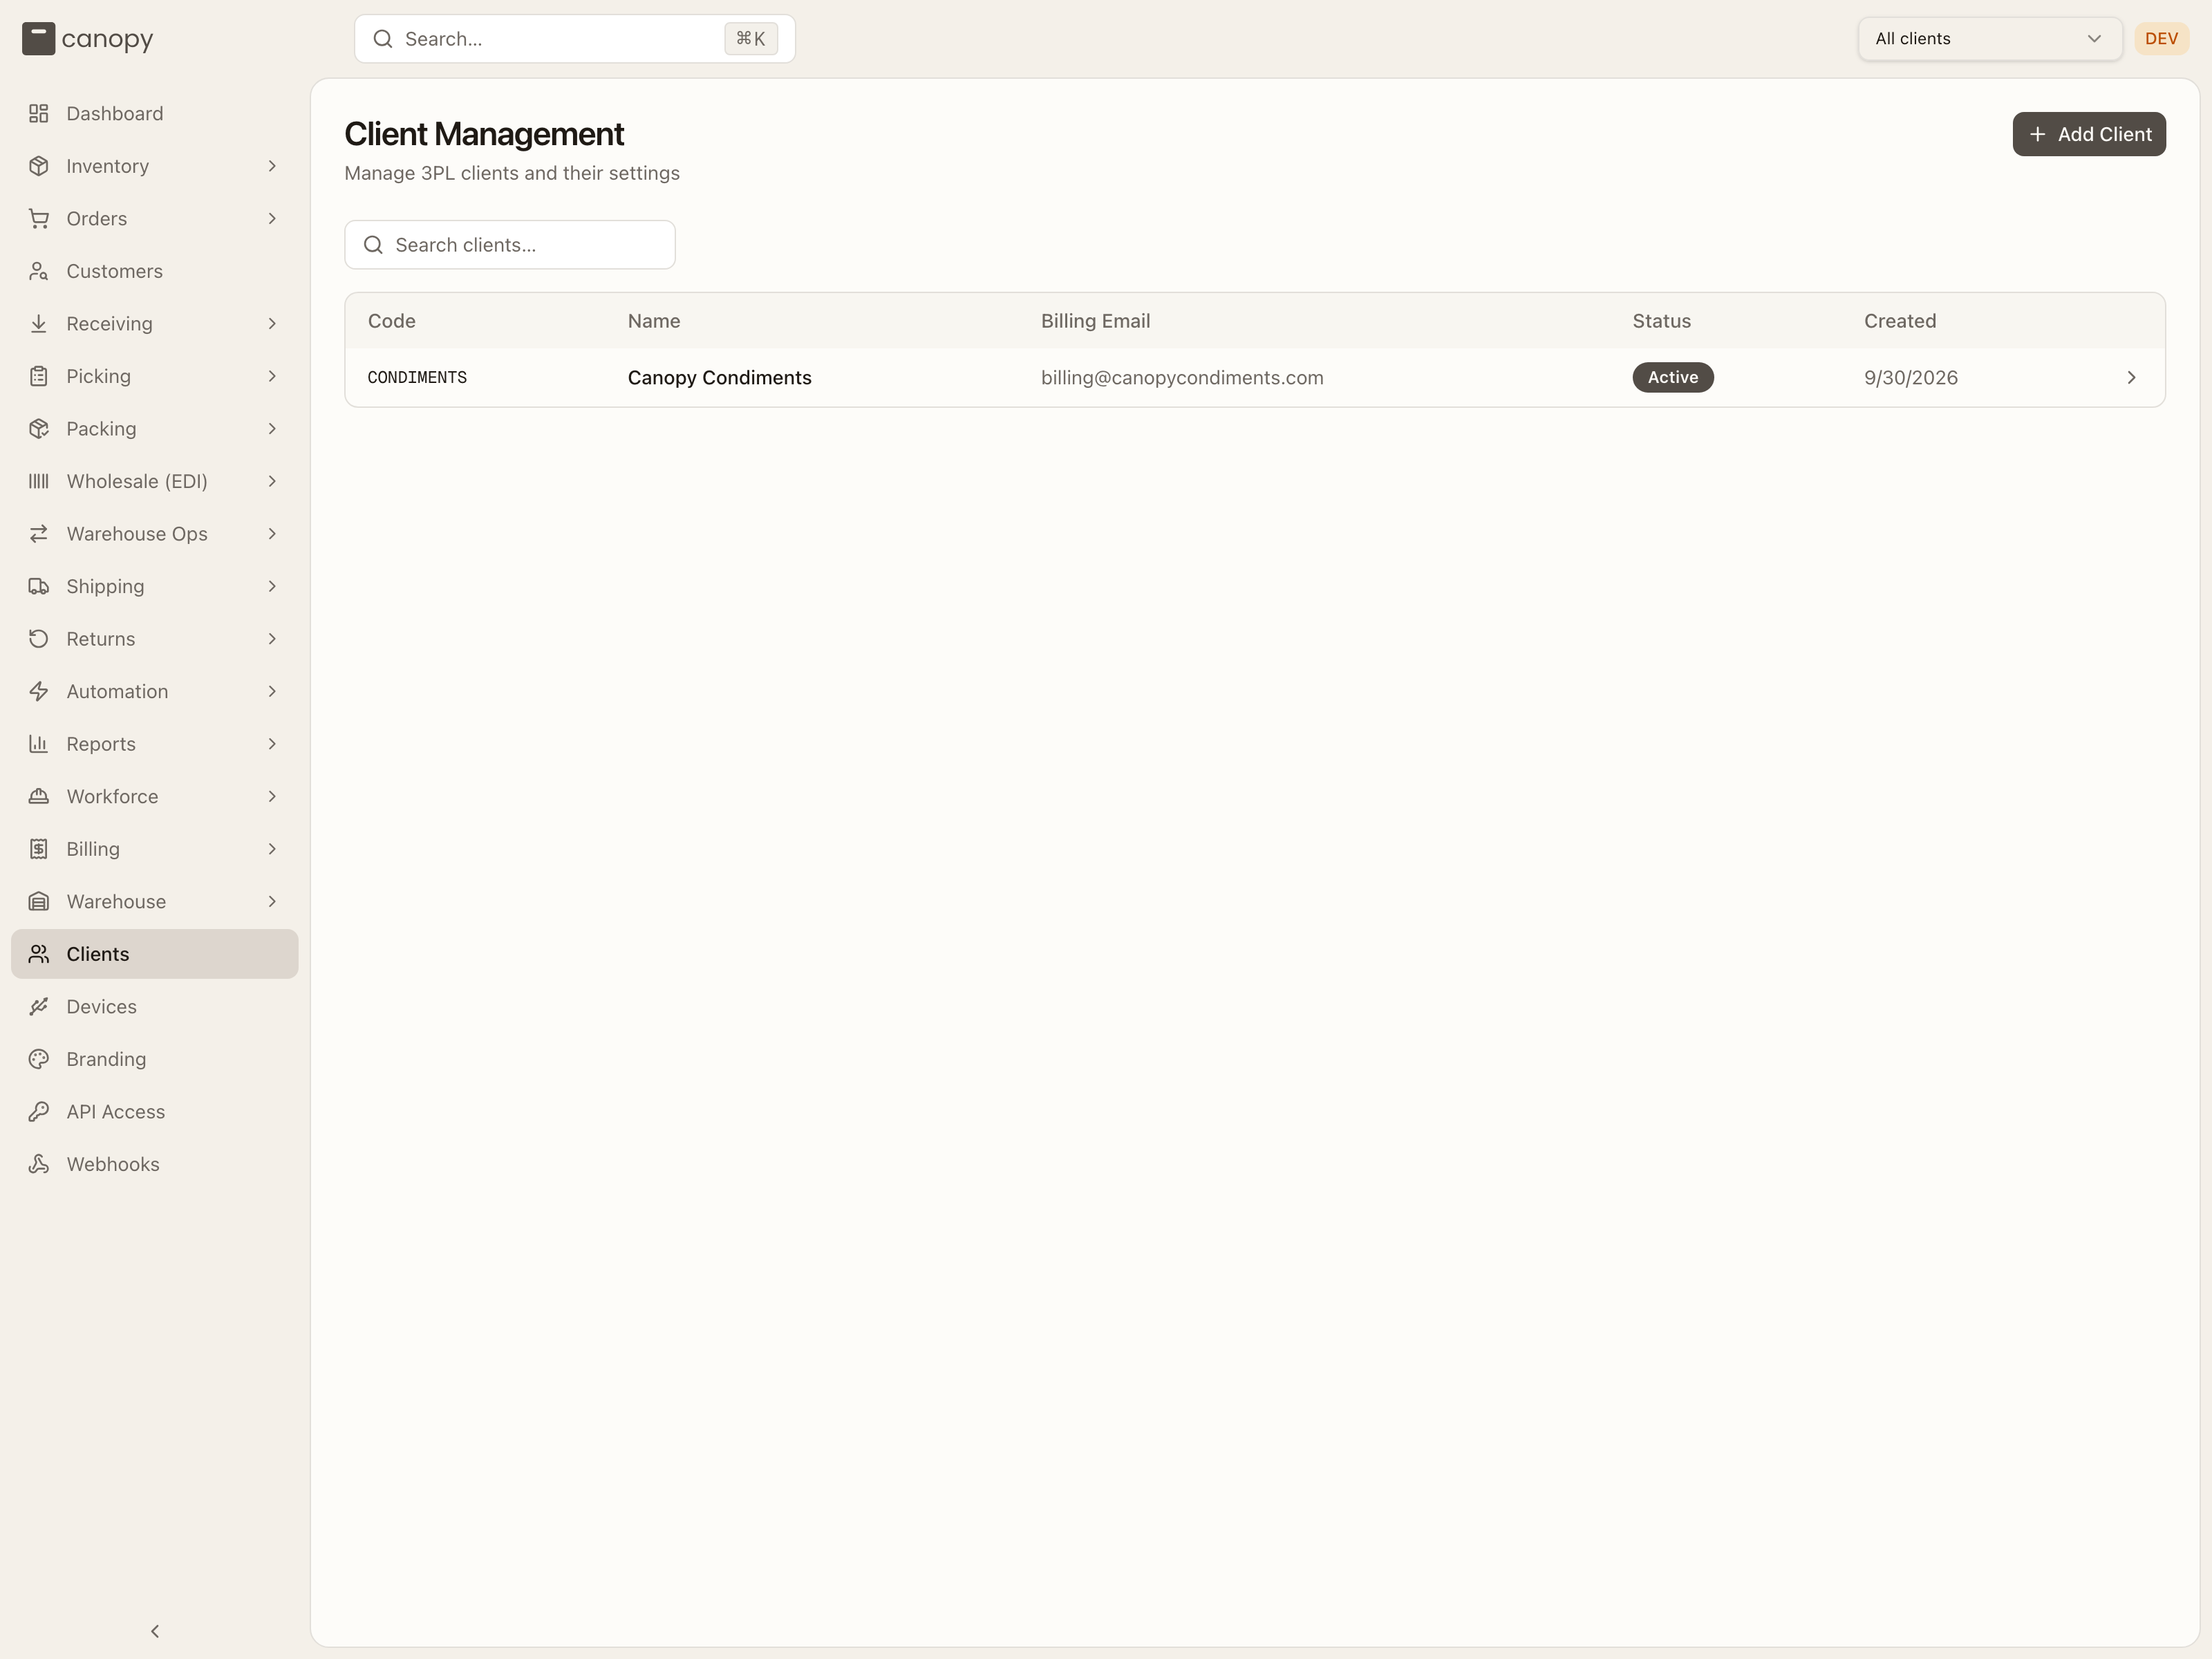
Clients → /clients. Every brand you run fulfillment for is a client. The
list shows each one's Code, Name, Billing Email, Status (Active
or Inactive), and Created date — click a column header to sort, and narrow
the list with the Search clients… box (an empty result reads "No clients
found"). Add Client (top right) creates a new one.
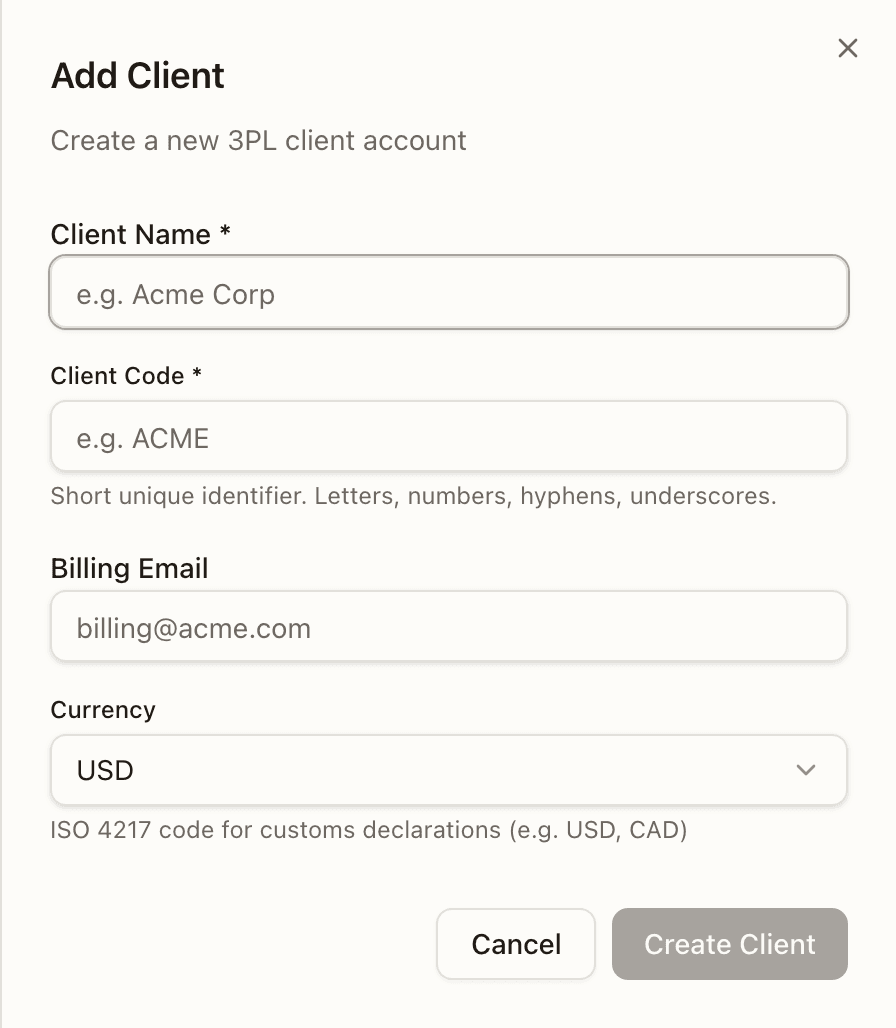
Add Client opens a sheet with four fields — Client Name (required), Client Code (required; letters, numbers, hyphens and underscores, uppercased as you type), Billing Email, and Currency (defaults to USD). Create Client stays disabled until the name and code are filled in.
The client detail panel
Click a row to open Client Details, headed by the client's Active / Inactive badge. Here you edit the client and tune how the system treats it:
- Client Name and Client Code — the code is the short identifier used
across the app (for example
CONDIMENTS). - Billing Email — where billing correspondence goes.
- Currency — the ISO 4217 code used on customs declarations.
- SLA target (hours) — drives the on-time fulfillment metric on the dashboard, counted in business hours against the warehouse's operating schedule. Any whole number from 1 to 720; typical is 24 for DTC, 48–72 for wholesale.
- Default pick strategy — how picks choose bins for this client's SKUs. Automatic lets the system decide (FEFO for expiry-tracked stock, FIFO for lot-tracked, bin efficiency otherwise); or pin FEFO — first expired, first out, FIFO — first in, first out, or Bin efficiency — largest stock first. Per-SKU overrides always win.
- Default warehouse (admins only) — where this client's orders are created when nothing else names a warehouse. The API integration (or Ship from on the order form), a routing rule, and a sales channel's own setting each override it; the warehouse pinned in the top bar doesn't. A purchase order, return or work order that neither its form nor the top bar places lands here too — a return tries the warehouse its order shipped from first. Left Unset on a multi-warehouse tenant, those are refused instead — an order with "Cannot create order: no warehouse could be resolved. Set the client's default warehouse…". Operators don't see this control at all.
- Sell ahead (warehouse staff only) — lets this client put sell-ahead quantities on PO lines: units advertised to their opted-in sales channels before the goods arrive, sold as backorders until the PO is received. Each channel also has to opt in under its Inventory settings.
- DTC partial shipments (warehouse staff only) lets this client's regular orders split across shipments: ship what's in stock now and backorder the rest, instead of holding the whole order for one missing line. This is the DTC default and the bottom of three tiers — a sales channel's own setting overrides it, and an automation rule or a per-order flag overrides both. Off means DTC orders inherit ship complete.
- Wholesale partial shipments (warehouse staff only) is a separate default for wholesale orders, initially off. An automation rule or per-order flag overrides it. DTC and sales-channel defaults do not apply to wholesale orders.
- Minimum to split (warehouse staff only) — two optional numbers, units and value. A short order splits only when the part it can ship now reaches both; below either one it waits whole. Value is unit price × units for the lines that are in stock, read in the order's own currency — it is not converted, so on a brand that sells in more than one currency the same number is read against each. Lines with no price count as zero; a kit that can ship whole counts at the kit's own price. Leave a field empty for no minimum.
- Wait before splitting (hours) (warehouse staff only) — how long an order must have been short before it may split, so stock about to land isn't split around. A whole number from 0 to 720; empty means no wait. If the rest of the stock arrives first, the order ships complete.
The minimum and wait are shared by DTC and wholesale orders. Neither turns partial shipments on. They only decide when an order that may split does. An automation rule can set a different minimum or wait on an individual order, and the order's own value wins even when it is lower. There is no sales-channel setting for these.
- Order merging (warehouse staff; shown only while your 3PL has order merging switched on, and only an admin can change it — "Only an admin can change these.") — its own card with its own Save merge rules: Offer merges (off: this client's orders never show as mergeable), Merge window (days) (only orders created in the last so many days group), Also require (on top of the same recipient and address: Same sales channel, Same shipping method, Same customer email, Same required ship date, Same priority), Leave out (Backordered orders (merging one delays the others' in-stock goods) and orders carrying any of the listed tags), Most orders in one merge (2 to 50; larger groups are offered in slices this size) and Hold the label when a merged order changes on the channel — on, a merged order cancelled, edited, shipped elsewhere or moved after picking holds the combined order's label until someone looks; off, the merge ships as it stands and the change only shows as a banner. See Merging orders.
Pack video
Below the merge rules, a Pack video card holds the brand's three video settings. Operators can read them. Only an admin can change them, and the card says so.
- Record pack videos for this brand. On by default. Switched off, no bench records this brand's packs and its users see nothing. There is no video of a pack that happened while it was off. Clips already recorded stay until their keep-for runs out.
- Brand may share links. Off by default. A share link is a public link to a pack's video that anyone can open, without signing in, until it expires. Switched off, this brand's users get no Share button; links your staff made stay live until they expire. Your staff can always share.
- Keep clips for (days). This brand's own keep-for, 7 to 365. Leave it blank to use the tenant's rule from Settings → Video.
Press Save video settings. How the clips are found, watched and shared is on Pack video.
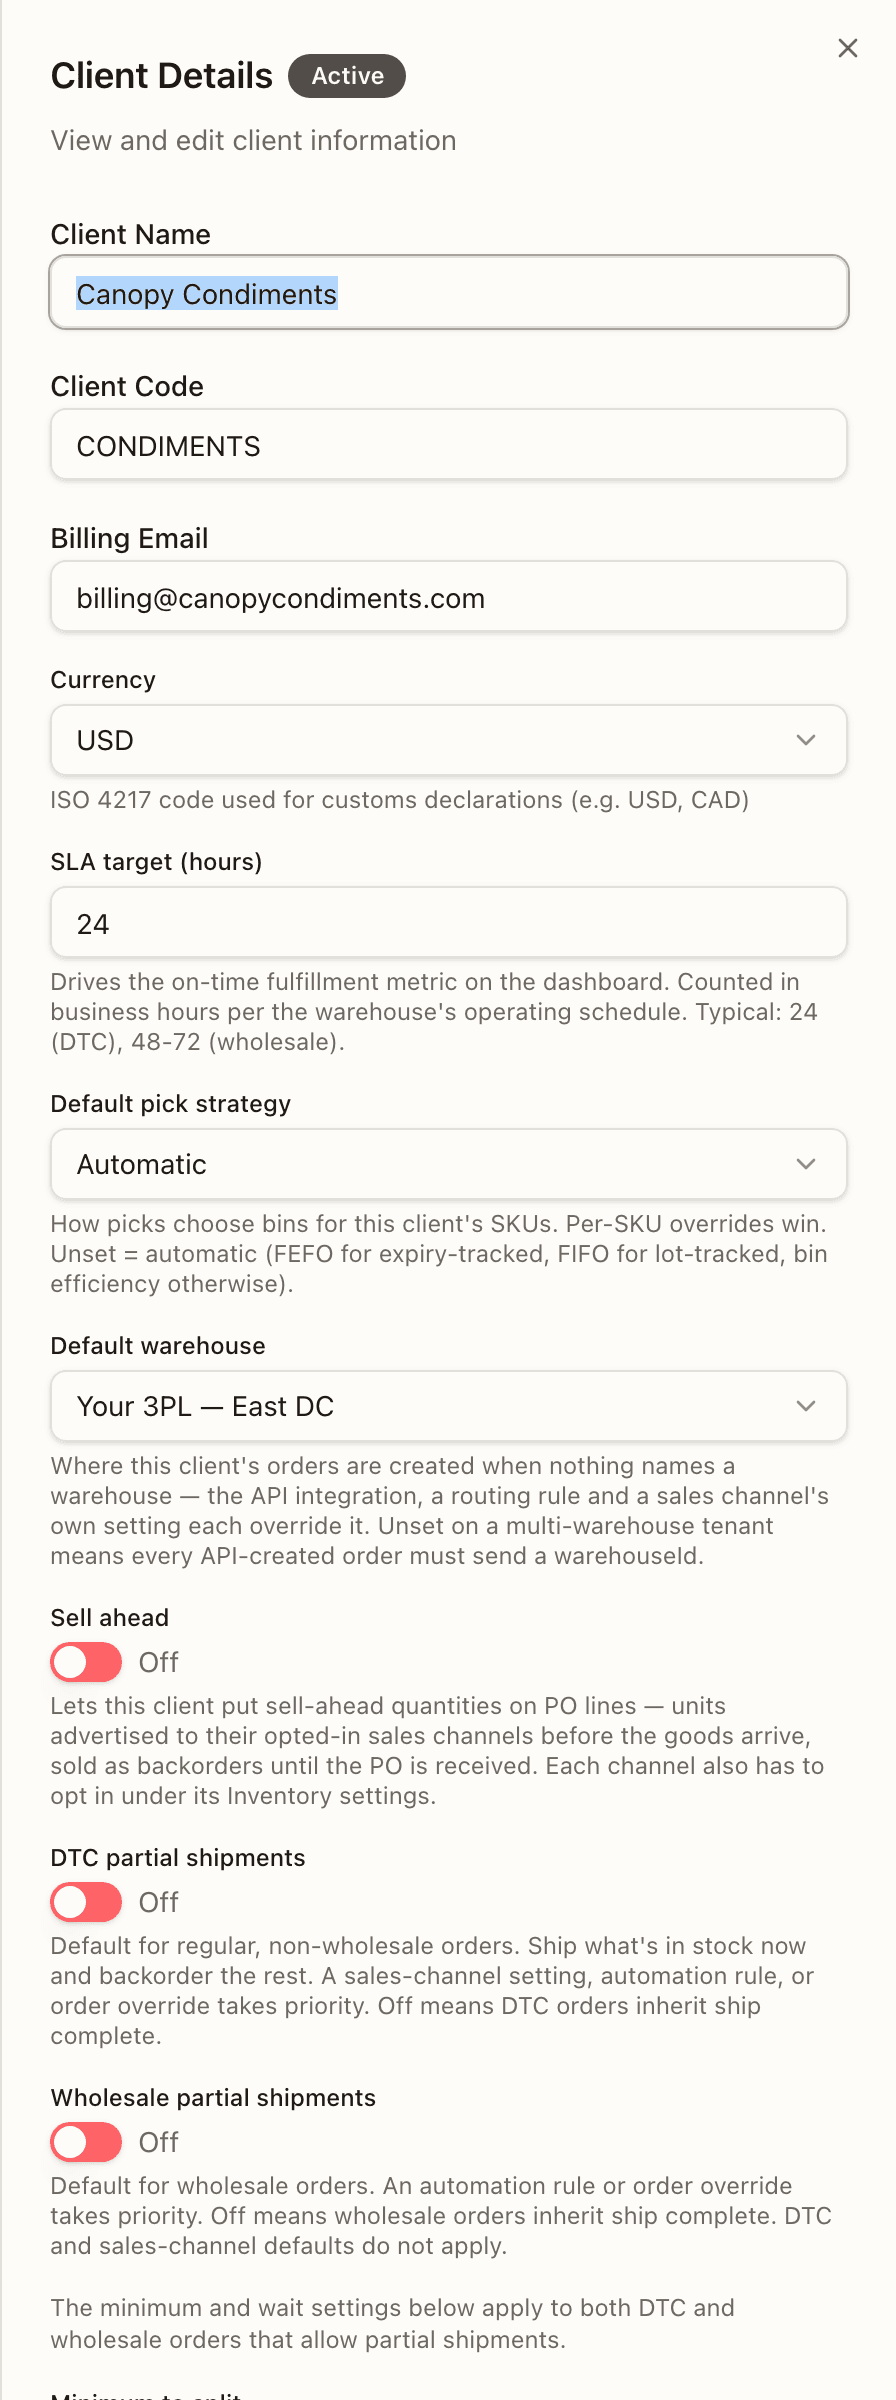
The panel also shows created / last-updated dates. Save Changes only lights up once something has changed. Bottom-left, Deactivate Client retires an active client — never a hard delete; the row stays in the list marked Inactive — and on an inactive client the same button reads Reactivate Client.
Users
Workforce → Users (/workforce/users). Everyone with a login in your
organization — your warehouse staff and your clients' users — grouped into one
table per role. (The old /users address redirects here.) It's the admin's
page: an operator who opens it sees only "Admin access required to manage
users."
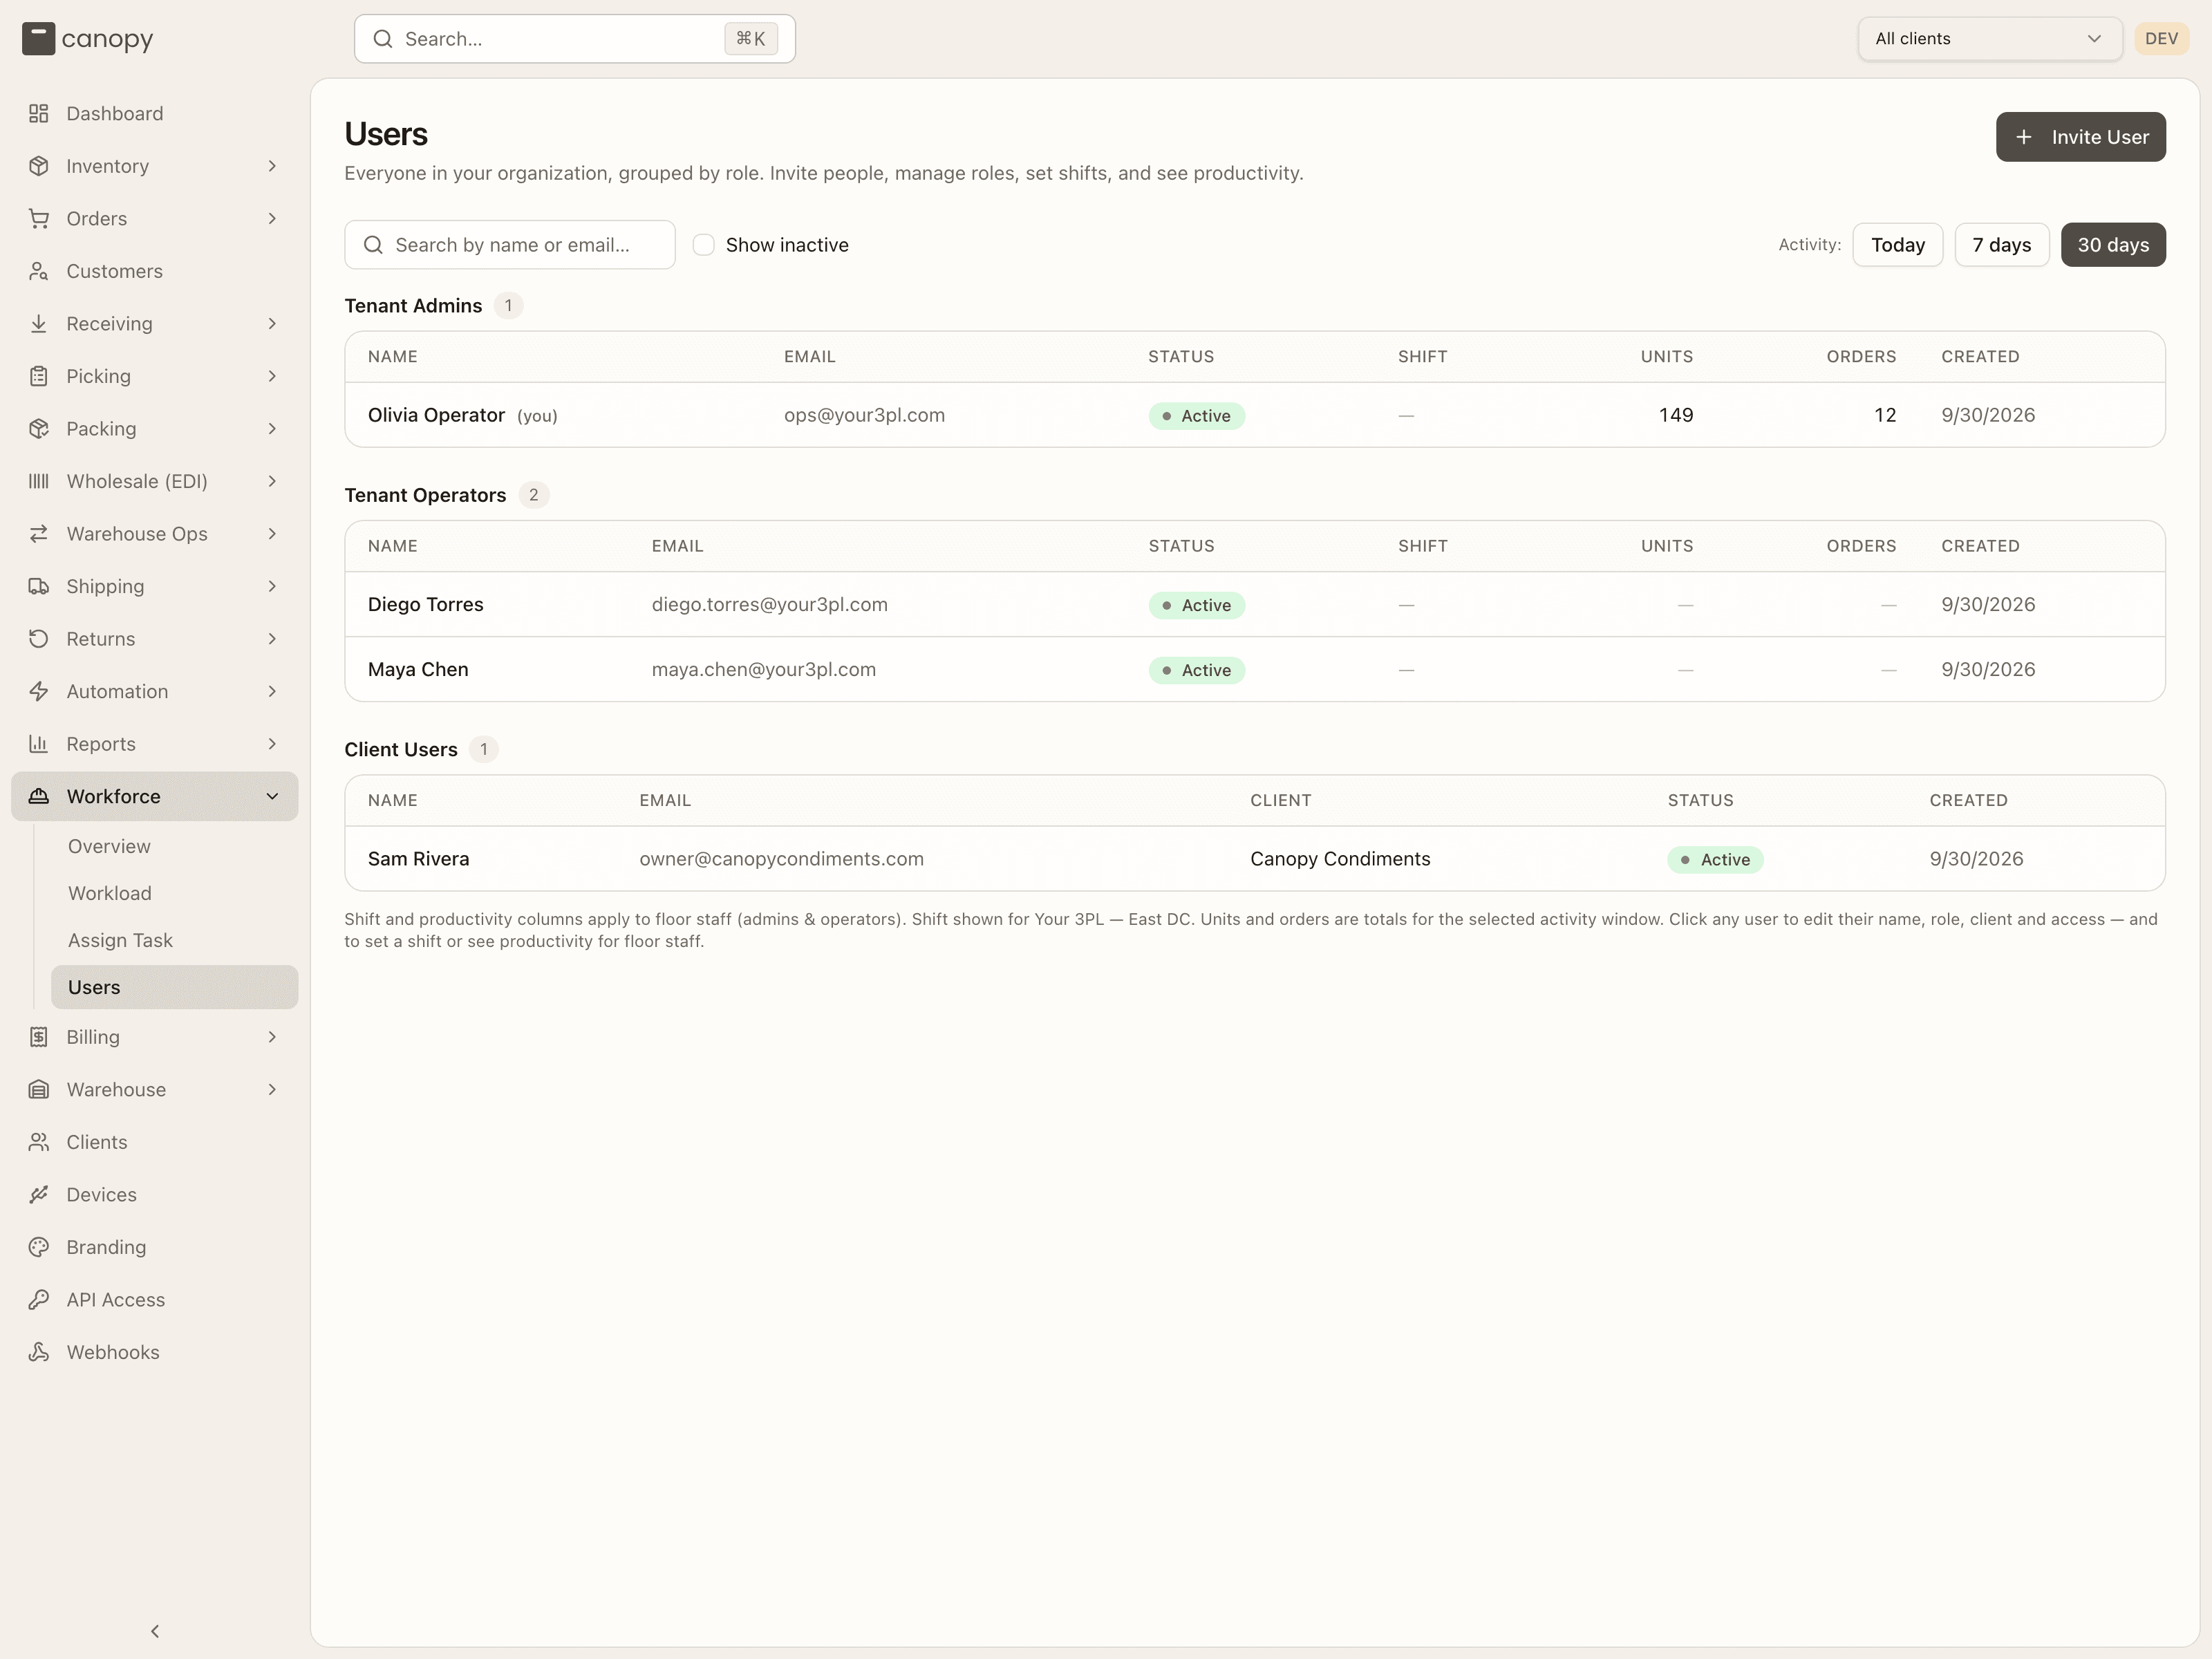
Above the tables:
- Search by name or email…
- Show inactive — include deactivated accounts.
- Client filter — appears only when your tenant has more than one client. Pick a brand to keep just the users pinned to it (tenant-wide staff drop out of view); All clients is the resting state. The topbar client switcher does not narrow this list.
- Activity: Today / 7 days / 30 days — the window behind the Units and Orders columns and the Performance blocks in the detail sheet. Defaults to 30 days.
A table appears for each role that has someone in it, headed by a count: Tenant Admins, Tenant Operators, Client Users, Canopy Support. Every table has Name (your own row is tagged (you)), Email, Status, and Created. The Client Users table adds a Client column — the brand each login is pinned to; the two staff tables add Shift, Units, and Orders from the Workforce module. A footer under the tables names the warehouse the shifts are for, or asks you to "Pick a warehouse in the top bar to see and assign shifts."
Status is Active, Inactive, or Pending (an invite that hasn't been accepted yet). Pending rows are dimmed and don't open — there's no account behind them until the person accepts.
There are four roles:
| Role | Who it's for |
|---|---|
| Tenant Admin | Full access. Can manage users, clients, and settings. |
| Tenant Operator | Warehouse staff. Can switch between clients but not manage users. |
| Client User | Locked to one client. Sees only that client's data. |
| Canopy Support | Canopy's own staff. Assigned by Canopy, never here — their role and client are platform-managed. |
The user detail sheet
Click any row (other than a pending invite) to open the person's sheet — their name, email, and an Active / Inactive pill up top, then up to four cards:
- Details — First name, Last name, Role (Tenant Admin, Tenant Operator, or Client User), and for a Client User the required Pinned client. A Tenant Admin or Tenant Operator also gets Default warehouse (None or one of your active warehouses) — "Where the app opens for them in a new tab. They can still switch." You can set it on your own row too; a Client User has none, and moving someone to Client User clears it. See Details in Workforce for how a new tab picks its warehouse. Save changes confirms with "Saved." You can't change your own role or client ("Ask another admin."), and Canopy Support rows say their role and client are platform-managed — only the name is editable.
- Shift assignment (floor staff only) — the person's shift at the warehouse pinned in the topbar. Shifts are per warehouse, so with All warehouses selected the card asks you to pick one first.
- Performance · window (floor staff only) — Picking, Packing, and Warehouse Ops blocks showing Units, Units / hr, Orders, and Orders / hr for the Activity window chosen on the page.
- Access — Deactivate user (a confirm dialog warns "They will lose access to the WMS but their audit trail will be preserved"), or on a deactivated account Reactivate user. You can't deactivate your own account.
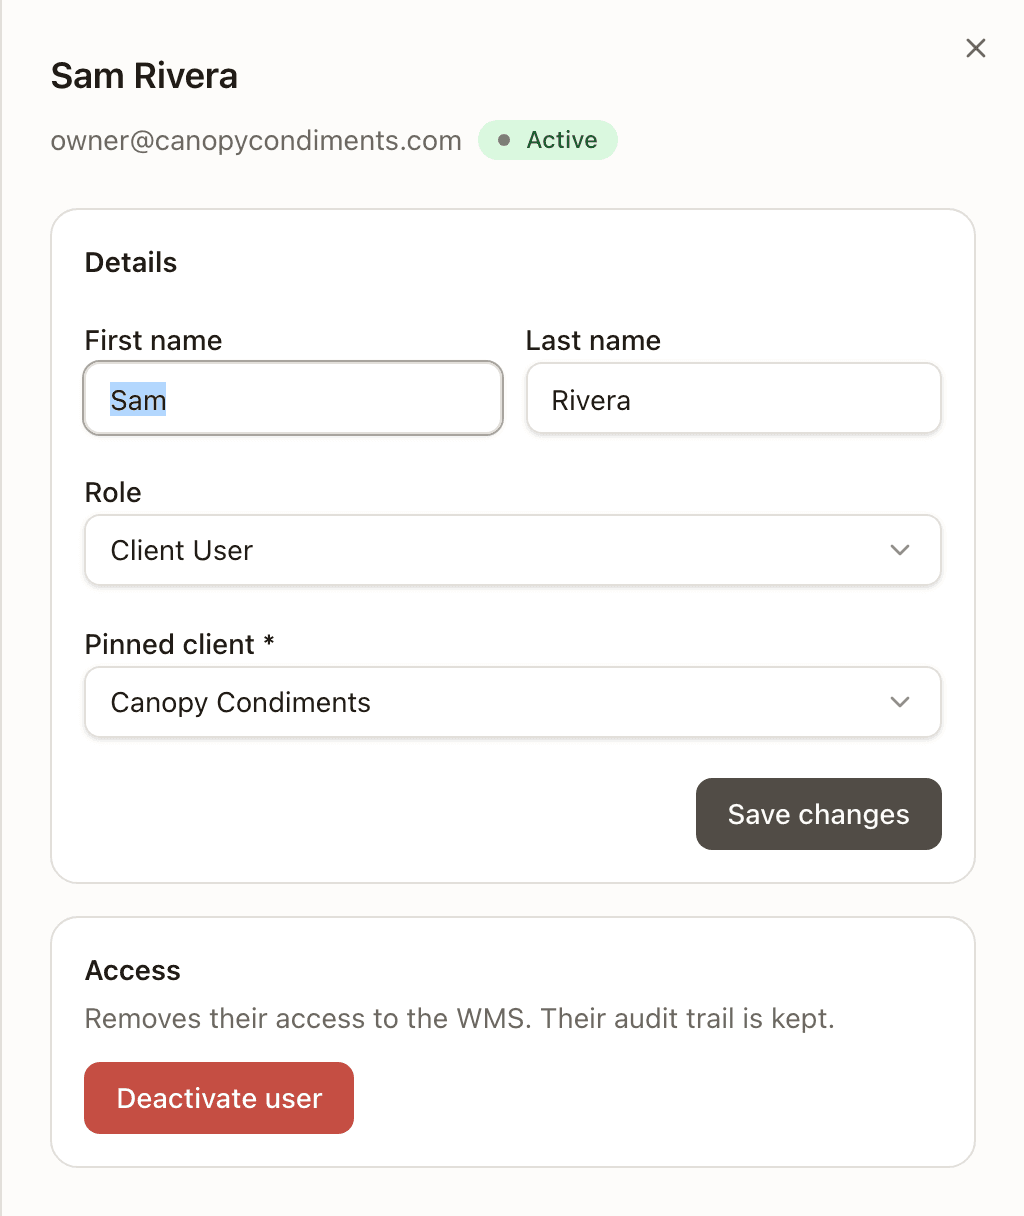
Deactivated users stay on record; tick Show inactive to find them again.
Inviting a user
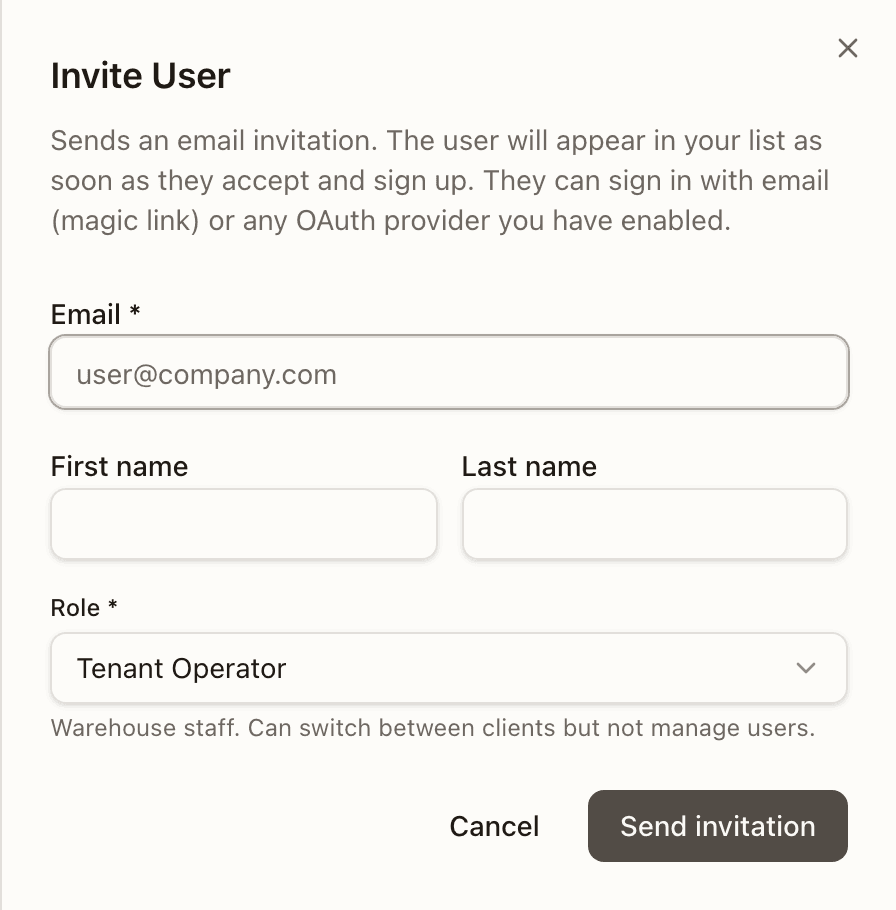
Invite User opens a form for the person's Email (required), First name, Last name, Role (defaults to Tenant Operator), and — for a Client User — the required Pinned client. Send invitation emails them; they sign in with their email (a magic link) or any OAuth provider you have enabled, and show up in the list as Pending until they accept. For the brand-side walkthrough see Invite a client user.
Task roles
A task role narrows a Tenant Operator down to one floor workflow. It's a second axis on top of the role above, and purely subtractive: it can only take pages away from someone who already has them, never add any. Staff with no task role keep everything their role allows.
| Task role | What they do | What they keep |
|---|---|---|
| Receiving Operator | Checks in inbound shipments against purchase orders | Receiving; their home page is Receive |
| Putaway Operator | Moves received stock from staging into storage locations | Warehouse Ops › Putaway (Task Queue, Active Tasks) |
| Picking Operator | Works pick lists and fills totes for outbound orders | Picking (Pick Lists, Active Pick, Short Picks, Totes, Discrepancies) and the floor app's pick flow |
| Packing Operator | Packs picked orders, buys labels, and ships parcels | Packing › Pack Station only — not Pack Order, Bulk Ship, Box Sizes, Stations, or the Shipping section. The role also reaches the bench's video recorder (its camera, its session, and a clip's upload), but not the clips, the Pack Videos page, or the video settings. It also reaches the live bench view's bench pass, so its station can be watched live, but not the Live Benches page, the pass to watch a bench, or the Live views audit (see Live Bench View). |
For a restricted user the sidebar and the search palette show only those pages (and the palette searches pages, not records), the Dashboard redirects to their home screen, and every other API call is refused. Notifications are not theirs either: no bell, no feed, no Follow. Admins are exempt, which is why only operators appear on the board. Assign and change task roles on the Workforce → Assign Task board — see Workforce.
Branding
Branding → /settings/branding. White-label the WMS for your tenant. Every
field is optional — leave them blank to use the default Canopy look.
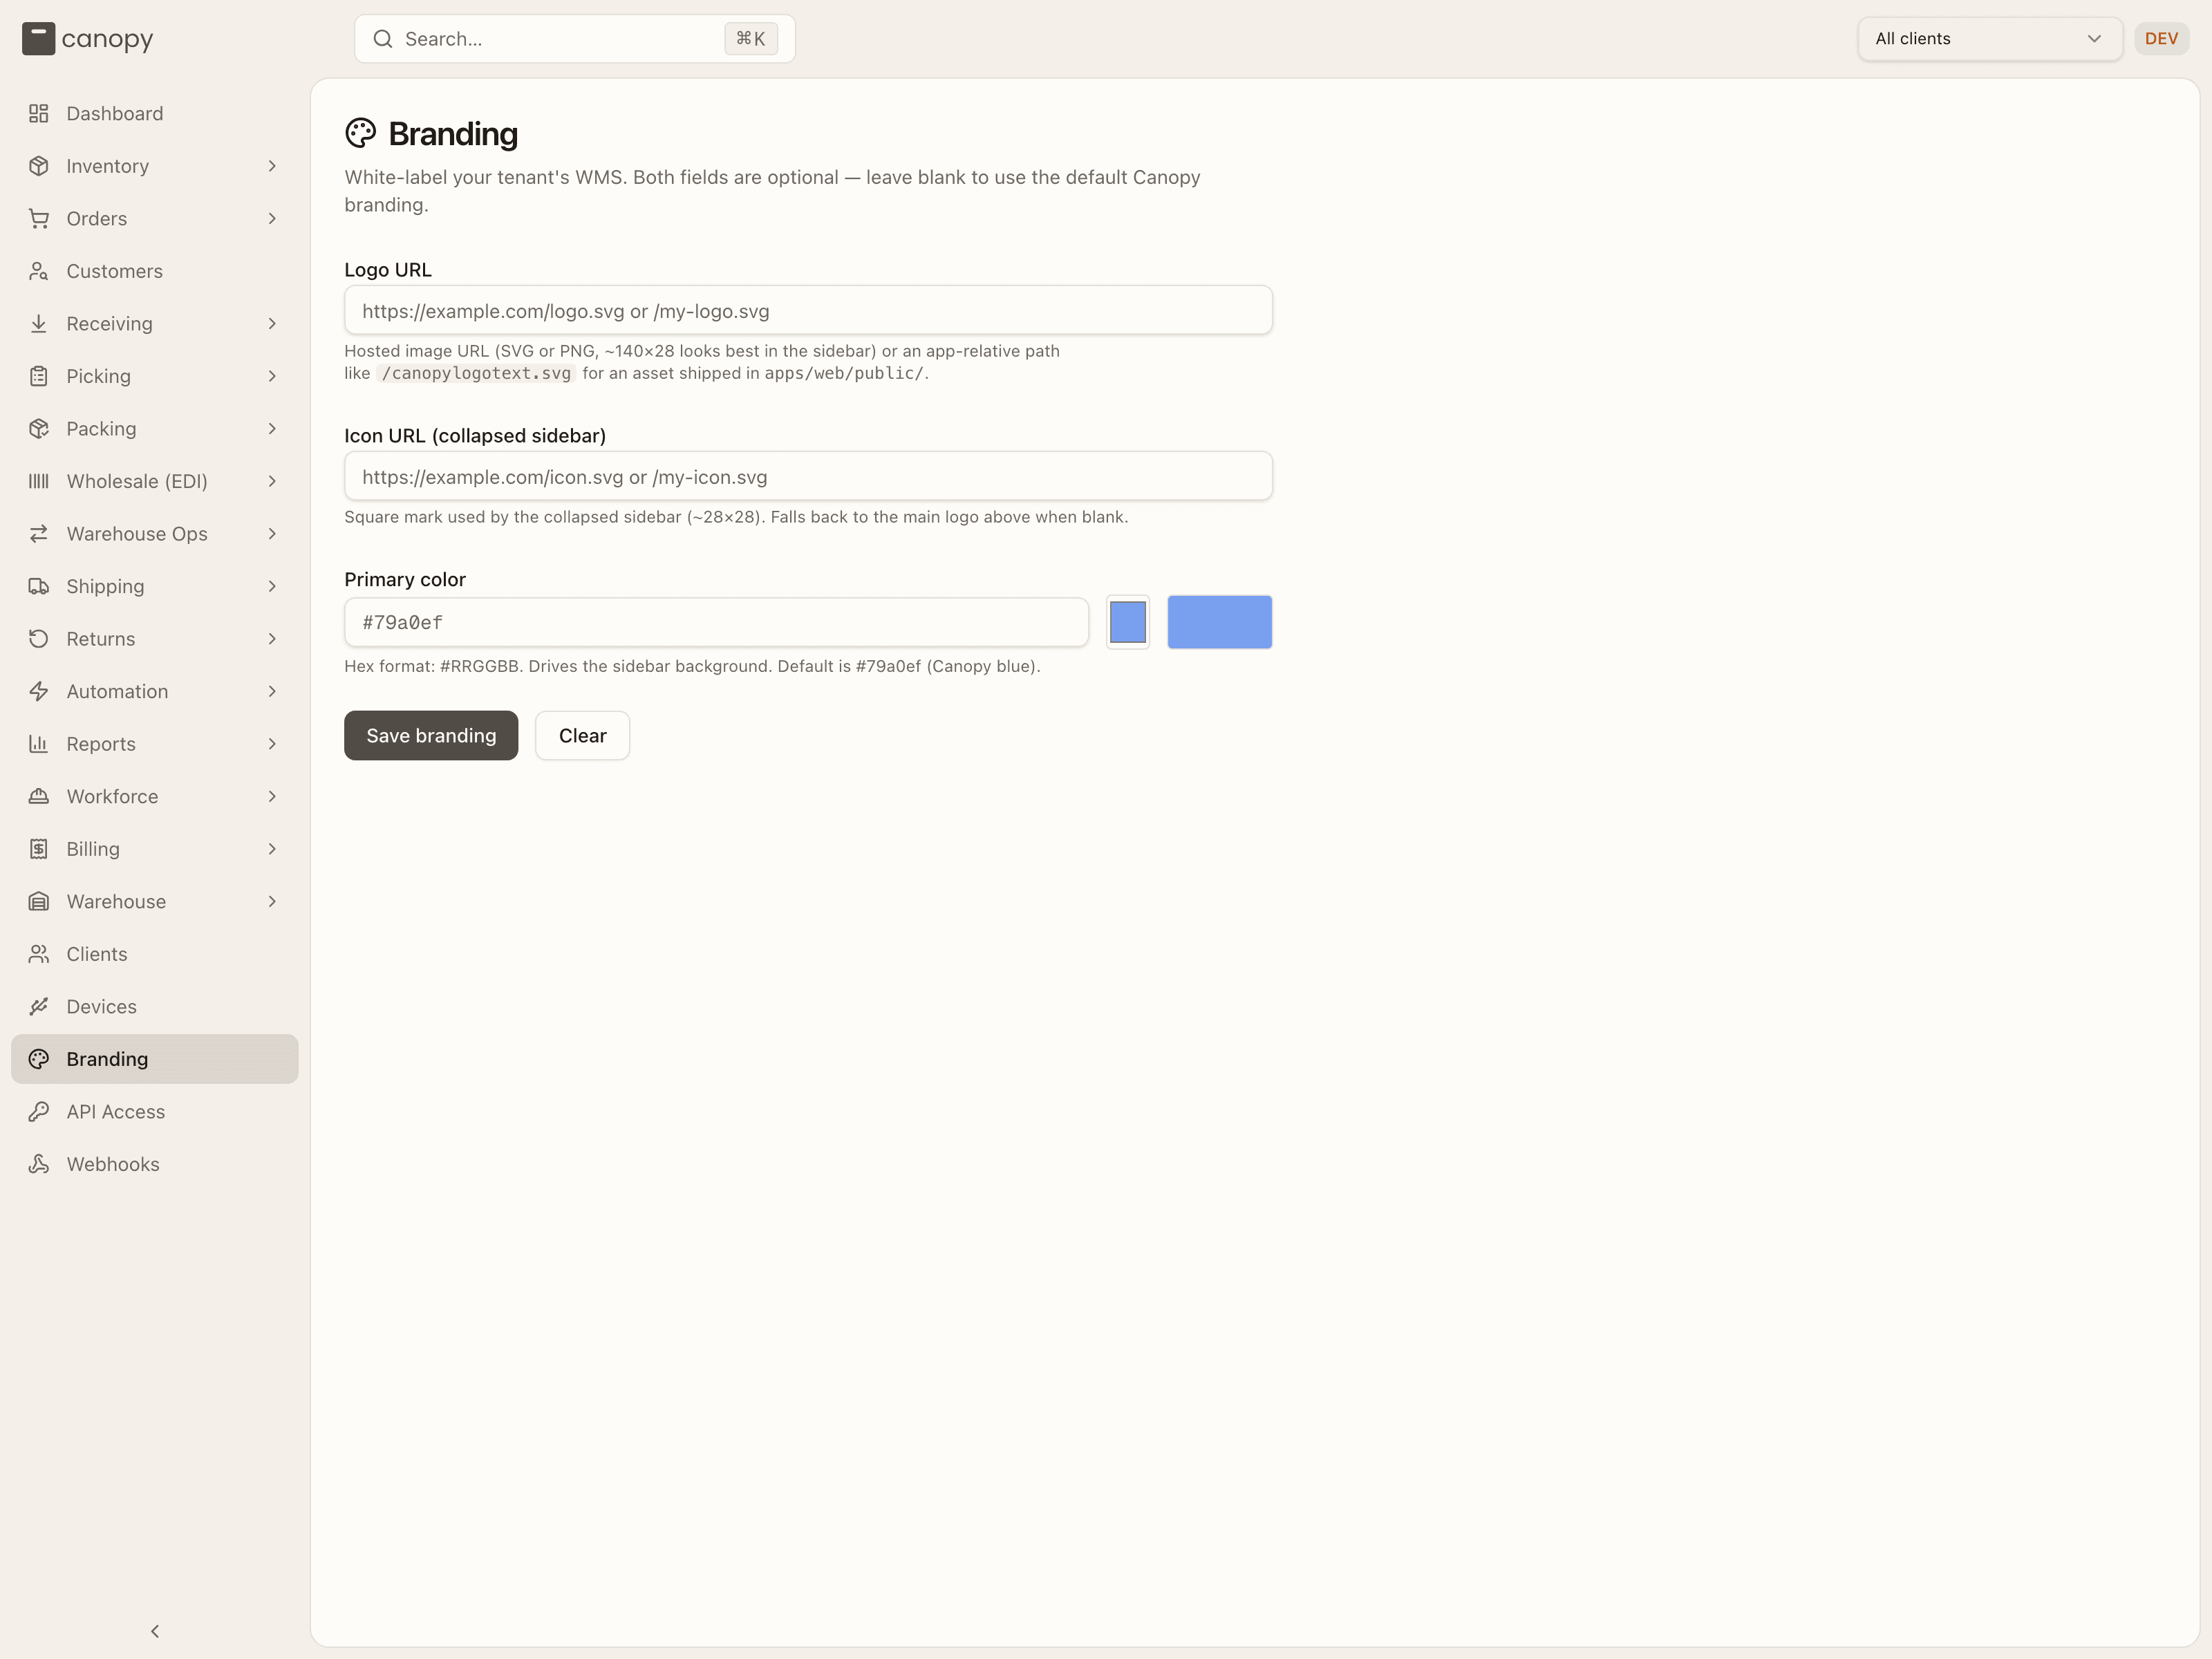
- Logo URL — a hosted image (SVG or PNG, roughly 140×28 works best) or an app-relative path. It shows a live preview.
- Icon URL — the square mark for the collapsed sidebar (~28×28); falls back to the logo when blank.
- Primary color — a
#RRGGBBhex value that drives the sidebar background, with a color picker and swatch preview. The default is Canopy blue (#79a0ef).
Save branding applies it immediately; Clear resets the fields.
Bin types
/admin/bin-types. The platform-wide catalogue of storage bin shapes —
what a warehouse's bins are declared as, and the values a rate card's Bin
type storage condition and the Per bin type wizard price against. It has
no sidebar entry; open it by address. The table lists each type's Code,
Name, Volume (cu in) and Status (Active or Inactive).
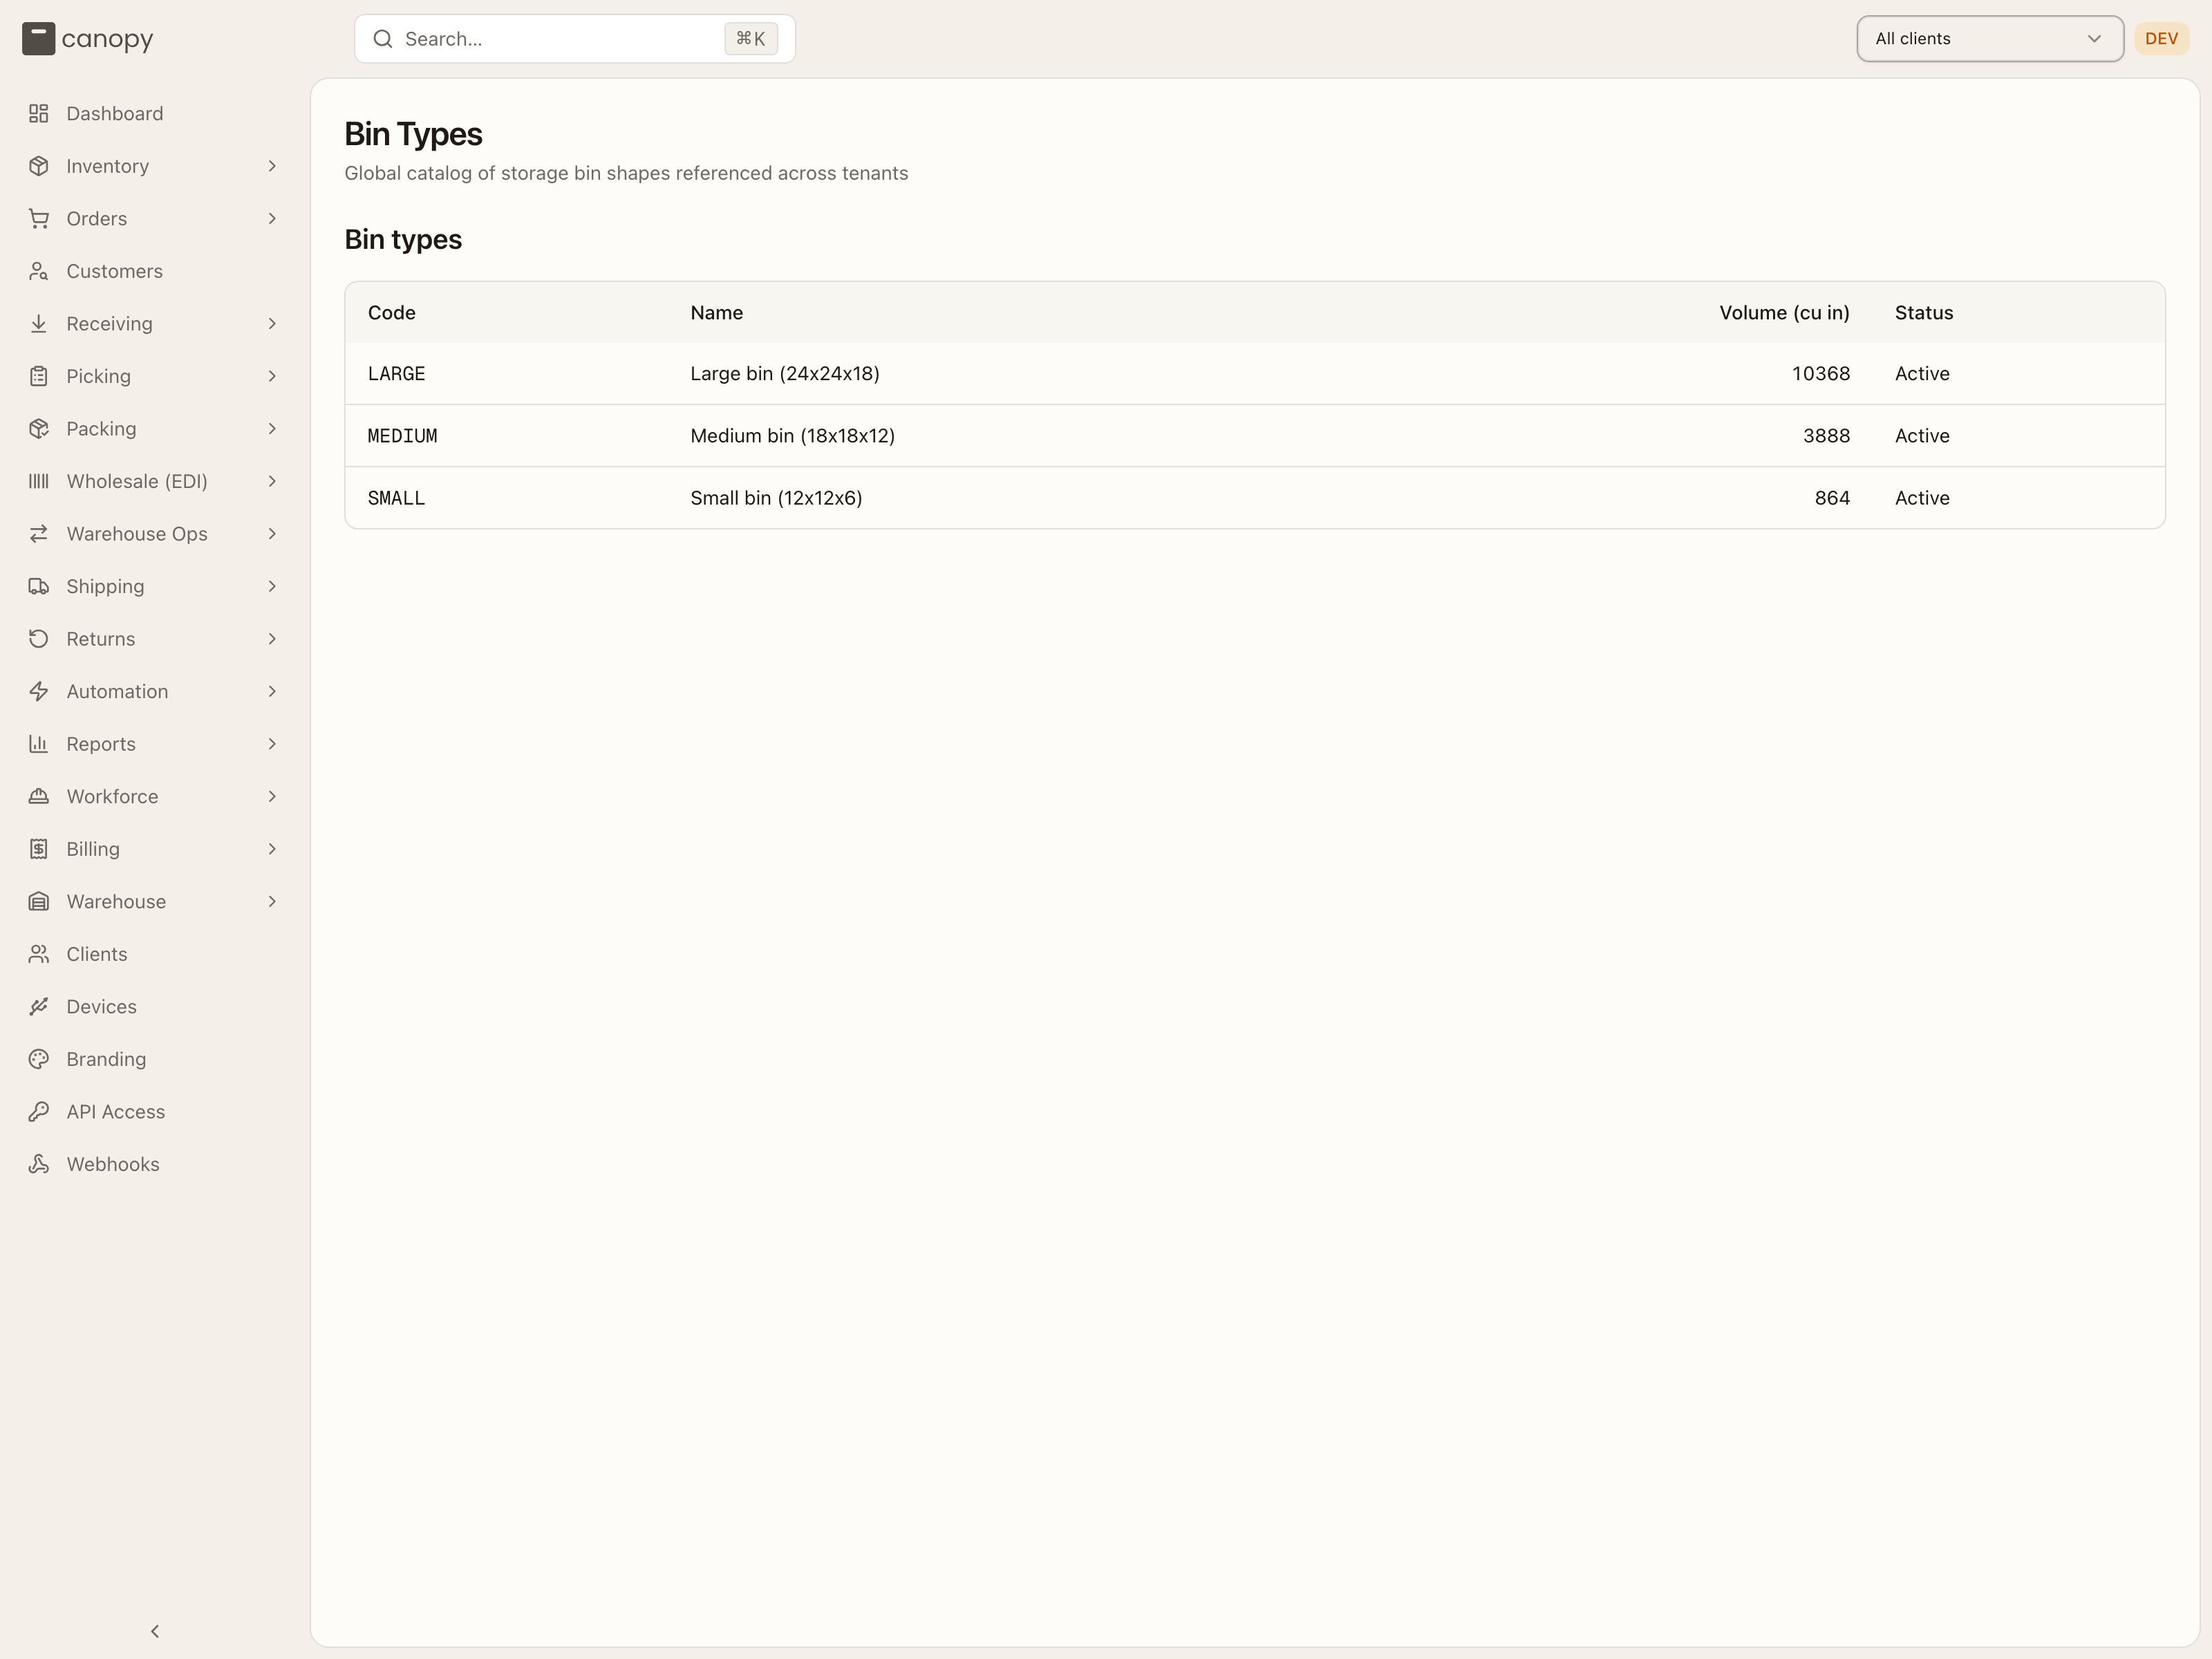
The catalogue is shared across every tenant, so it is read-only for a Tenant Admin: Add bin type and each row's Edit appear only for Canopy Support, and Edit today only reveals how many bins across how many tenants reference the type — "Changes affect every tenant." — there is no edit form yet. Any signed-in user can read the list.
Other settings
Three more sidebar entries are settings pages with their own chapter, Settings:
- Devices (
/settings/devices, warehouse staff) — hardware such as a USB shipping scale paired with this browser; pairing lives on the workstation, not on your account. - API Access (
/settings/api-credentials, admins) — server-to-server credentials for partner integrations. - Webhooks (
/settings/webhooks, admins) — signed, retried event notifications pushed to your systems.
Labor productivity (Workforce → Overview) and the live labor board (Workload) are covered in Workforce.
How to change a client's settings
Open Clients and find the brand
Press Clients near the bottom of the sidebar. The page is titled Client Management and lists every brand with its Code, Name, Billing Email, Status and Created date. Type in Search clients… to narrow the list.
Click the row
The Client Details panel slides in from the right, headed by the client's Active or Inactive badge, with every field already filled from the record.
Edit the identity fields
Change Client Name, Client Code (it is uppercased as you type), Billing Email or Currency as needed. SLA target (hours) takes a whole number from 1 to 720. Default pick strategy offers Automatic or one named strategy. What each field does is under The client detail panel.
Set the fulfillment defaults
Lower down: Default warehouse (Unset or one of your warehouses; admins only, an operator does not see it), then the Sell ahead, DTC partial shipments and Wholesale partial shipments switches, each reading On or Off, then Minimum to split (a Units box and a Value box) and Wait before splitting (hours). A number the server would refuse shows an error under its field, such as Units must be a whole number of 0 or more, and blocks the save until you fix it.
Press Save Changes
Save Changes, bottom right, lights up once something differs from the record. It reads Saving... while the change goes through, then the panel closes. You need the admin role: an operator sees the same button, but the server answers Admin access required and nothing changes. The Save video settings button on the Pack video card below saves that card on its own, as does Save merge rules on the merge card, which shows only where order merging is switched on.
Retire a client with Deactivate Client
To stop working with a brand, press Deactivate Client at the bottom left of the same panel. The client stays in the list marked Inactive; nothing is deleted. On an inactive client the button reads Reactivate Client. This is admin-only too. While the brand still has billing activity that is not invoiced, the server refuses and a toast says why: wait for the billing period to close and invoice it, or hand-void the open-period charges that should not bill.
How to look up a bin type
Open the Bin Types page by address
There is no sidebar entry. Type /admin/bin-types after the app's address. The page is titled Bin Types, with the line Global catalog of storage bin shapes referenced across tenants. Any signed-in desk user can read it; a floor worker under a task role is sent back to their home page.
Read the row you need
The table lists every type's Code, Name, Volume (cu in) and Status, Active or Inactive. The type is what a bin is declared as, and what a rate card's Bin type storage condition prices against.
Ask Canopy for a new type
A Tenant Admin cannot add one. Add bin type and each row's Edit render only for Canopy Support, and the API serves reads only, so there is no form behind them yet. The catalogue is shared by every tenant on Canopy. If your warehouse needs a shape that is not listed, ask Canopy support.
Operations
The money pipeline — billing periods and their charges, invoices, adjustments, carrier reconciliation, the ad-hoc approval inbox, and stranded money.
Settings
The three standalone settings pages at the bottom of the sidebar — Devices (USB scale and camera pairing), API Access (partner API credentials), and Webhooks (signed event endpoints).