

Getting Started
Your first ten minutes in CanopyWMS — signing in, the 3PL-and-clients model, the topbar switchers and search, roles, and how to find your way around.
Before you touch a module, get your bearings. This page explains the app shell you'll stare at all day: how you sign in, why a 3PL juggles many "clients," the switchers and search box at the top of every screen, and what your role lets you see. New to the vocabulary too? Keep the Glossary open alongside.
Signing in
You don't sign yourself up. An admin at your 3PL invites you by email; until you accept, your account shows as Pending. The invite links you to a sign-in page (often white-labeled with your 3PL's logo and colors) where you finish setting up. After that you sign in with your email — via a magic link or an enabled provider — and sign out from the avatar menu in the top-right.
Who set up my account?
If you can't sign in, it's an account issue, not a bug — ask whoever administers your WMS. Brands (your clients) sign in to the same app: a client login is pinned to its own brand and sees a shorter sidebar and only that brand's data, with the warehouse-floor tools left out. What they see is documented in the Brand Portal tab of these docs.
Your 3PL and its clients
Two words appear everywhere, so pin them down now:
- Tenant — your entire 3PL company account (the whole CanopyWMS instance your team logs into).
- Client (or brand) — one company you fulfill for.
A 3PL has many clients because it warehouses and ships for many brands at once. That's why nearly every record — a SKU, an order, a bin's stock, a return — belongs to a specific client. Keeping brands' inventory and orders separate is the whole job.
The topbar
Left to right, the bar at the top of every screen holds the search box, then on the right the client switcher, the warehouse switcher (only on multi-warehouse tenants), and your avatar menu.
While a pack bench's camera is recording and you are on another page, a Recording · Camera 1 pill sits before the client switcher. Click it to get back to the Pack Station. See Pack video.
The bell
A bell sits before the client switcher, with a count of what you have not read. Click it for the latest events on the records and the event types you follow. Floor staff under a task role have no bell. What it tells you, and how to choose, is on Notifications.
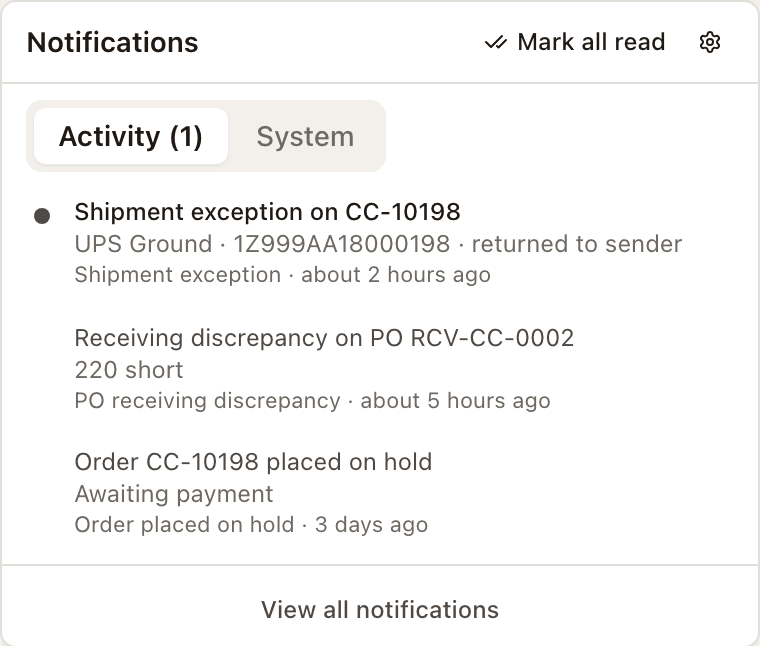
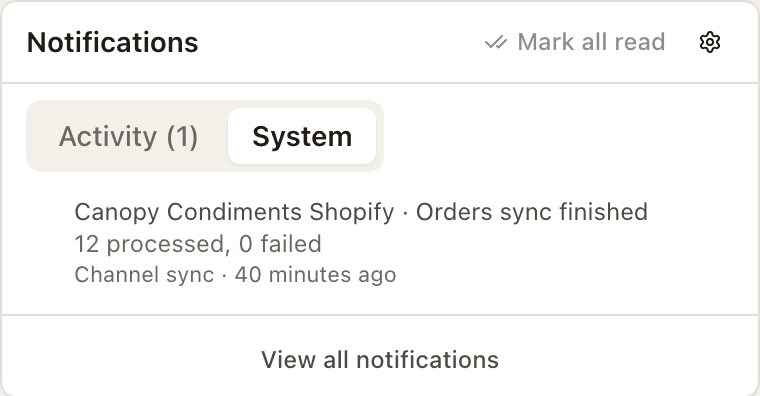
The bell has two tabs. Activity is other people's work on the records and event types you follow. System is your own: what an action of yours came to, such as a channel sync you started finishing or failing, and the confirmations and errors you already saw as toasts. A tab shows its own unread count in its label, and the badge on the bell counts both. Mark all read clears the tab you are on. Until anything of yours has finished, the System tab reads What your own actions come to — an invoice sent, a sync finished — lands here. The full rule is under Activity and System.
The client switcher
The client switcher sets the scope of every screen you open. It's a searchable dropdown: open it and type to find a brand by name or code.
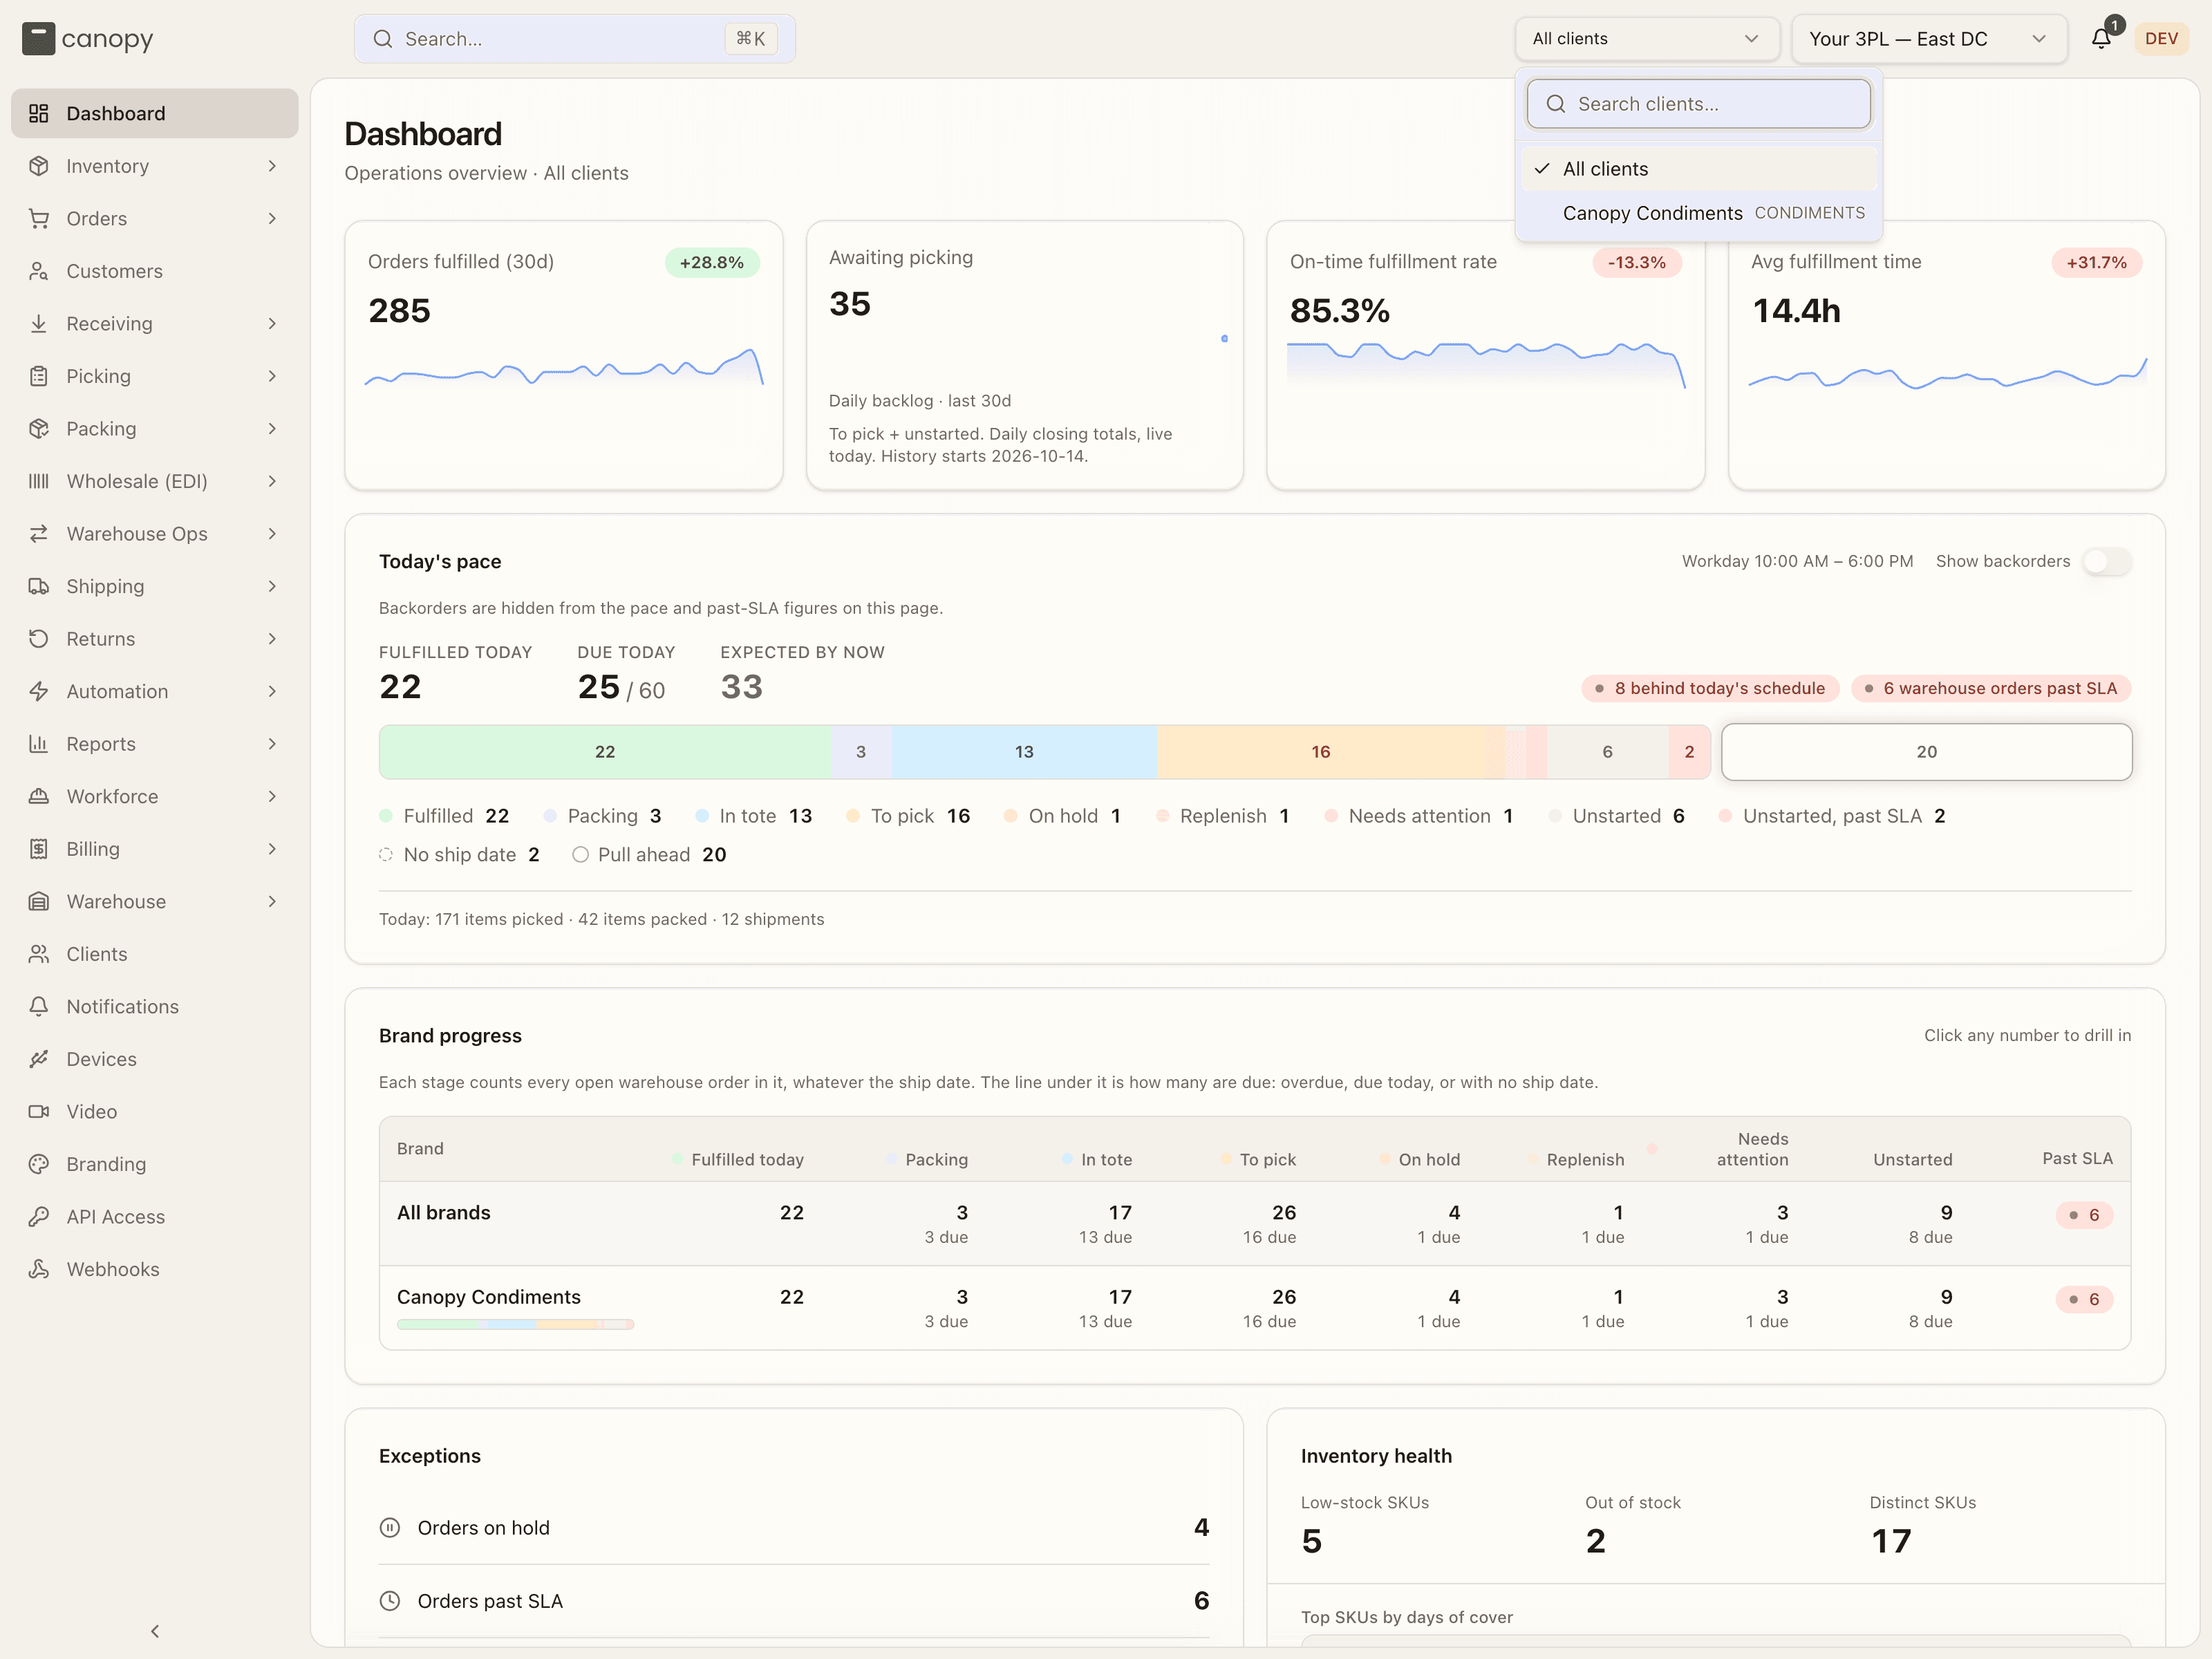
- All clients (the default) shows every brand's data together — the tenant-wide view, with a Client column on most lists.
- Pinning a brand narrows everything to that one client. The sidebar, lists, dashboards, and reports all re-scope.
- Some create surfaces are per-client. A few (like Return Codes and Automation) hide their Add button and prompt "Select a client" until you pin one; others (like Add SKU) stay available and ask you to choose the brand inside the form.
What 'pin a client' means
When the docs say pin a client, they mean choose that brand in this switcher. It's the fastest way to work inside one brand's world.
The warehouse switcher
Tenants with more than one active warehouse get a warehouse switcher next to the client switcher. It scopes lists (and the warehouse map, cycle-count queue, and pick sessions) to one building, with an All warehouses option; changing it reloads the page. Starting a pick session requires a specific warehouse pinned here, and so does setting shifts. Single-warehouse tenants don't see it.
Each browser tab keeps its own choice, so a reload stays where you were and two tabs can show two buildings. A new tab, or a fresh sign-in, opens at your default warehouse if an admin has set one for you (Default warehouse on your row under Workforce → Users), otherwise at the choice you last made in any tab, otherwise at the first warehouse.
The switcher sets which building you're looking at, not where a new order ships from. A new order ships from the warehouse its Ship from names — Create Order offers it once there are two warehouses — else where the client's routing rules or its sales channel sends it, else the client's Default warehouse (see Clients). Purchase orders, returns and work orders do use the warehouse pinned here when their form names none; on All warehouses the purchase order form shows a Warehouse picker that starts at Client's default warehouse.
Search (⌘K)
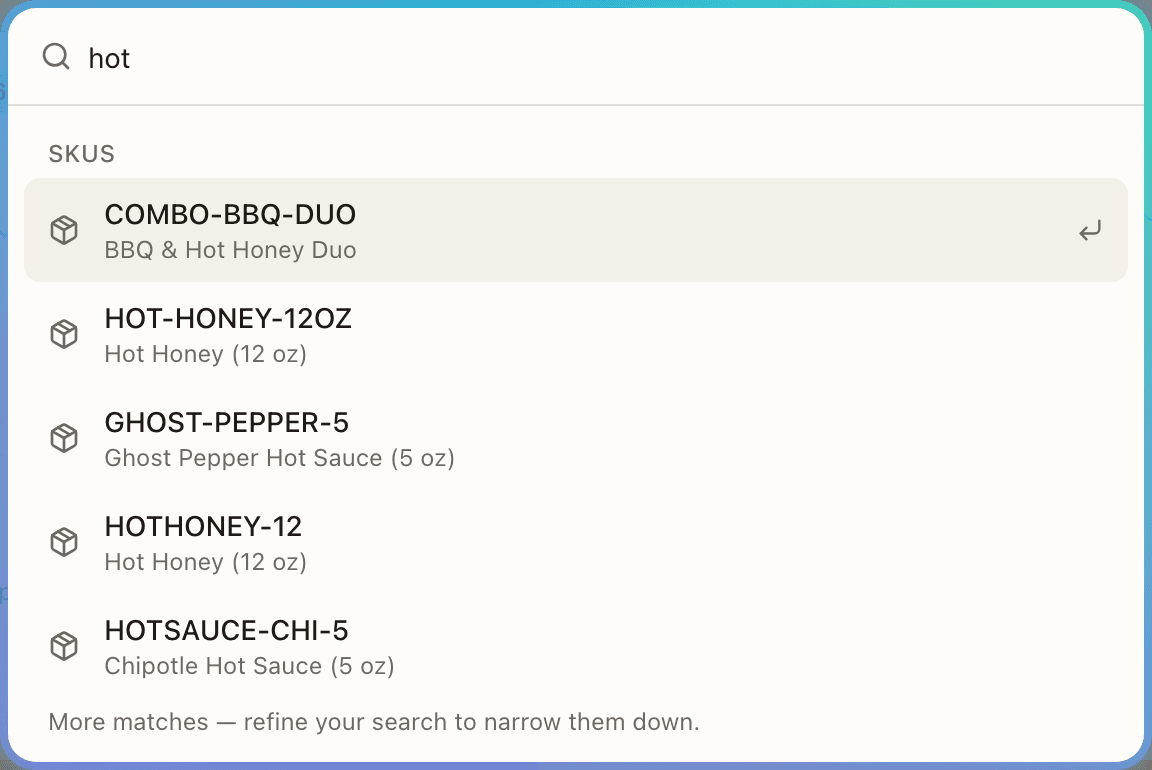
The Search… box in the middle of the topbar opens a command palette — or press ⌘K (Mac) / Ctrl K (Windows) from anywhere. Start typing and matching Pages appear on the first keystroke (sidebar destinations, matched by label and by what people call them — bins finds Locations, 850 finds EDI Orders). From two characters on, record matches follow in their own groups: orders, shipments, SKUs, inbound shipments, returns, wholesale orders, lots, bins, work orders, totes, and clients, scoped to the client you've pinned. Arrow keys move, Enter opens. With an empty box the palette lists your Recent picks (with a Clear).
Roles — what you can see
What you can see and do depends on your role:
| Role | Who it's for | Can do |
|---|---|---|
| Tenant Admin | 3PL managers | Everything — including client settings, user management, task roles, and branding. |
| Tenant Operator | Warehouse floor staff | Run every operational module (receive, pick, pack, ship, returns). Can open the Clients list/detail, but every client write is refused server-side ("Admin access required"). Can't manage branding, and the Users page shows only "Admin access required to manage users." |
| Client User | A brand's own staff | Only their own brand's data, in this same app with a filtered shell — see the Brand Portal tab. |
| Canopy Support | Canopy staff | Cross-tenant support access. Assigned by Canopy, never by a 3PL admin. |
On top of that, an admin can give a Tenant Operator a task role — Receiving, Putaway, Picking, or Packing Operator — which narrows them to that one workflow's pages (the sidebar, the search palette, and the API all shrink to match, and the Dashboard redirects to their home screen). It only ever removes access, never adds it. See Task roles and the Assign Task board.
This guide is written for Tenant Admins and Operators. Where an action is admin-only (like managing users or branding), the relevant page says so.
Finding your way around
The left sidebar is your map. Top to bottom it lists, for an admin: Dashboard, Inventory, Orders, Customers, Receiving, Picking, Packing, Wholesale (EDI), Warehouse Ops, Shipping, Returns, Automation, Reports, Workforce, Billing, Warehouse, Clients, Devices, Branding, API Access, and Webhooks. This guide walks them in the conceptual order work flows through the warehouse instead — Orders come in, you Receive stock, store it (Inventory, Warehouse, Warehouse Ops), Pick and Pack it, Ship it, and handle Returns — then the cross-client sections: Dashboard, Customers, Automation, Reports, Wholesale (EDI), Workforce, Administration (Clients, Users, Branding), and Settings (Devices, API Access, Webhooks).
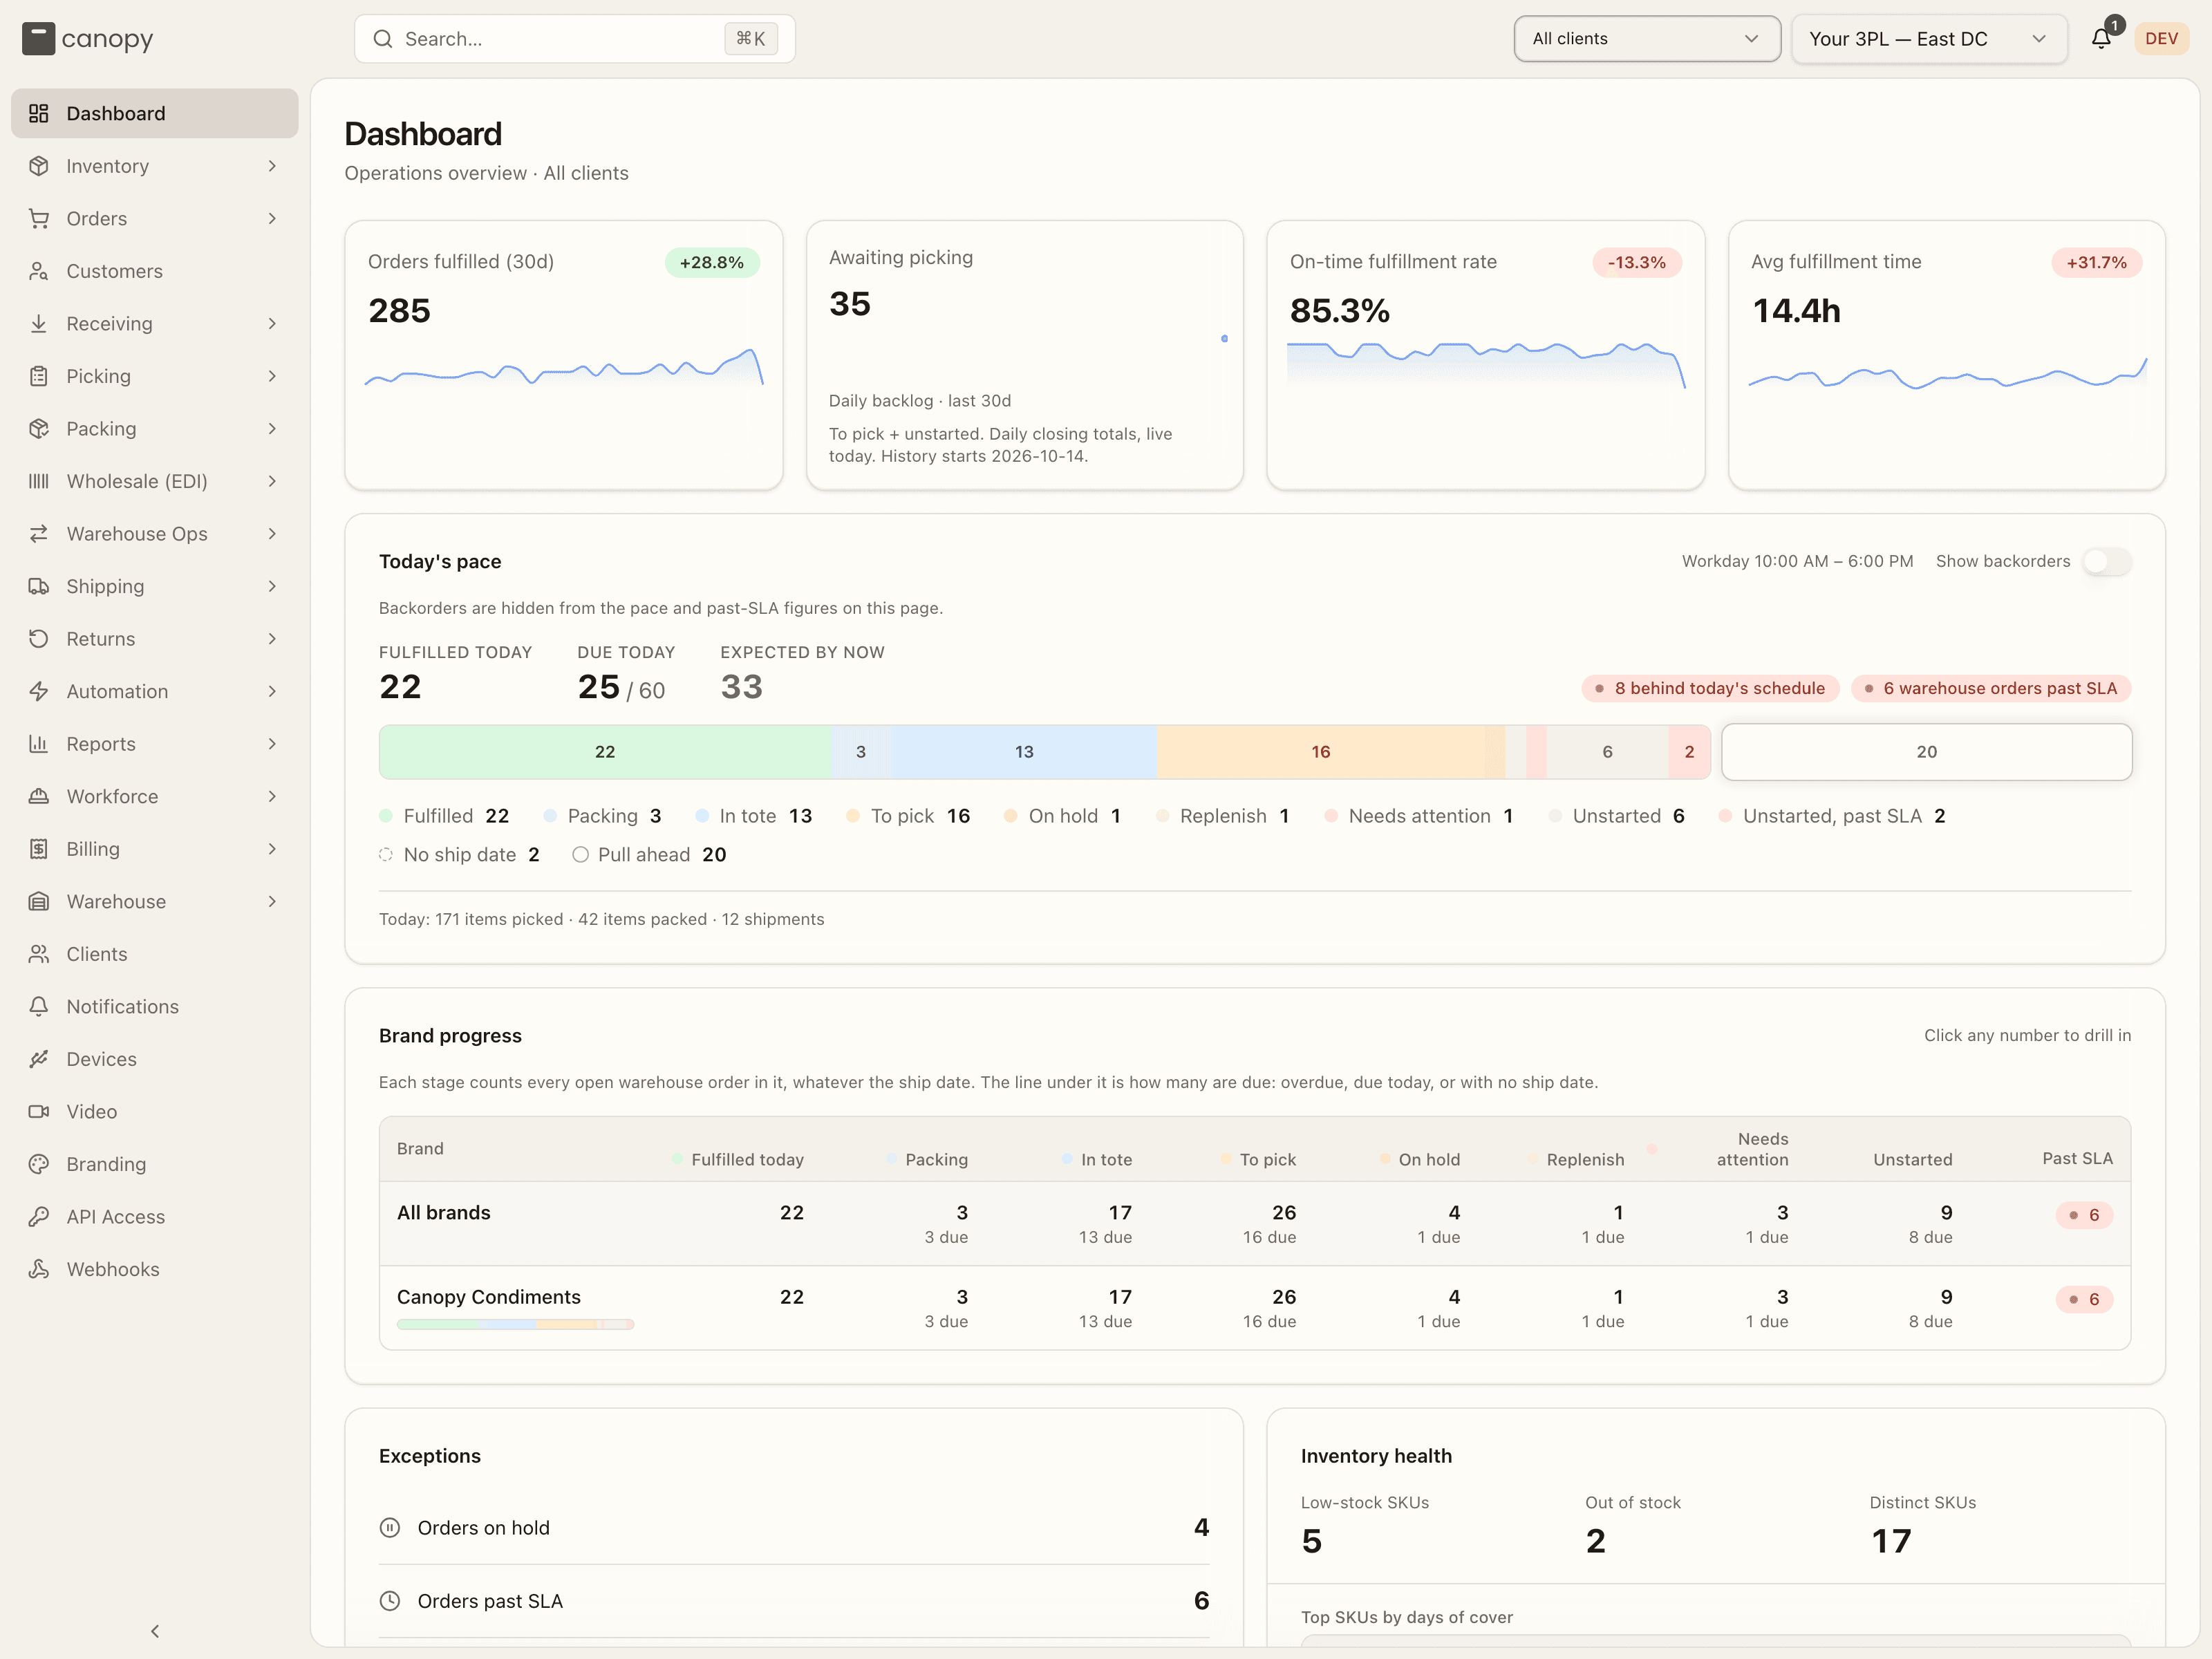
Modules with sub-pages expand when you click them; a collapse toggle at the bottom narrows the sidebar to icons. Items you don't have the role for simply don't appear: Branding, API Access, Webhooks, and Workforce's Assign Task and Users are admin-only, as are Shipping's Carriers and Shared Carriers and Inventory's Storage Tags. Billing appears only where its launch switch is on — its chapter is Billing. One entry isn't covered in this guide: Work Orders (under Orders) is out of scope for now.
How to sign in
Open your 3PL's sign-in address
Your admin gives you the address. It is either the plain sign-in page, /sign-in on the app's domain, or your 3PL's own page at /your-3pl/sign-in, where your-3pl is the short name Canopy gave your company. The branded page shows your 3PL's logo, or its name, over the line Sign in to followed by that name. Both pages open without a session, as does a pack video opened through a share link. Every other page sends you to sign in first.
Enter the email your invitation went to
Type the email address your 3PL invited, and continue. The form belongs to the sign-in service, so finish the way it asks: with the link it emails you, or with a sign-in provider your 3PL has turned on. There is no sign-up of your own: an admin invites you first (see How to invite a user), and until you accept, your row on the Users page reads Pending.
Land on the Dashboard
Signing in drops you on the Dashboard, the app's front page. A floor worker under a task role is sent on to that role's home page instead. The browser tab starts at your default warehouse, if an admin set one for you, not at whatever the last person using the tab had picked. With no default it falls back to the warehouse last chosen in this browser.
Pick a client in the switcher
The client switcher sits at the top right. It shows All clients, every brand's data together, until you pick a brand, and the browser remembers the pick for next time. Open it, type part of a brand's name or code in Search clients…, and choose it. Every list, dashboard and report on screen narrows to that one brand; All clients widens it again. A brand's own user has no switcher, only a fixed label with their brand's name.
Sign out from the avatar menu
Your avatar, at the far right of the top bar, opens your account menu. Sign out there. You come back to the sign-in page, and the next sign-in in that tab starts at your default warehouse again.